Environmental: Architecture
Part 2
This unit will begin with learning perspective drawing. You will learn conventions of the building and architecture industry such as terminology, making and understanding how to read a floor plan as well as architectural drawings. This unit focuses on issues of sustainability, energy efficiency and community living.
Purpose (What is being assessed)
- Conceptualisation and development of imaginative or personally relevant visual ideas. (Evidenced through brainstorming, design roughs and annotations) PA1
- Documentation of creative visual thinking and/or problem-solving processes. (Evidenced through a complete design process) PA3
- Application of technical skills with media, materials, and technologies to communicate visual ideas in resolved work(s) of art or design. (Evidenced through design roughs and final design) PA4
- Knowledge and understanding of visual arts in different cultural, social, and/or historical contexts. KU2
- Research and acknowledge sources to explore and develop insights into aspects of the visual arts. (Evidenced through research) KU4
- Use of visual arts language to interpret and respond to works and their contexts. AR2
- Evaluation of own practical work. AR3
Process:
Part 1
- Draw a building using two-point perspective.
- Complete a series of tasks such as floor plans and model joinery to develop working skills and knowledge ready for designing your house.
- Research existing tree houses and community living. You may wish to include other inspirational imagery to refer to when designing your house.
- Annotate the images collected to explain the ideas they give you and how you might apply these ideas in your design
- Generate design roughs with a broad range of ideas. Annotate these roughs to explain the benefits and implications of the designs
- Refine your designs referencing other architectural works
- Evaluate your design; does it meet the design brief?
- Draw elevations of your building / structure.
- Create a model to display your final idea with a focus on craftsmanship
Tree House Design
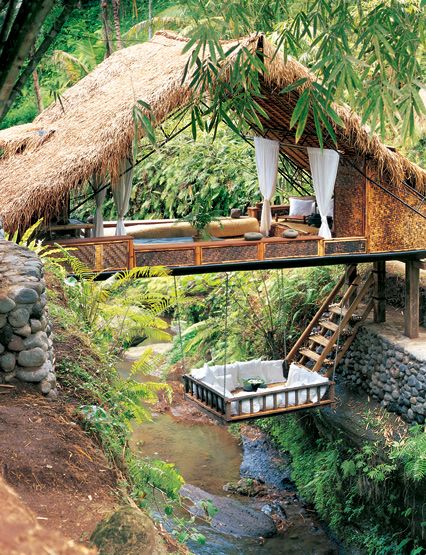
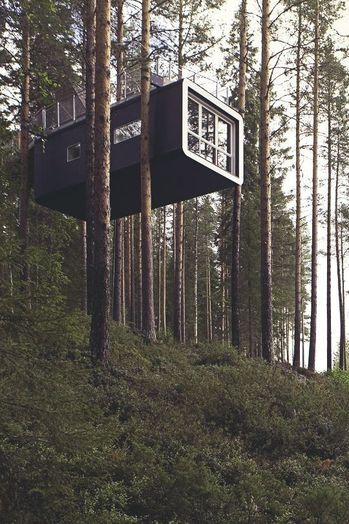
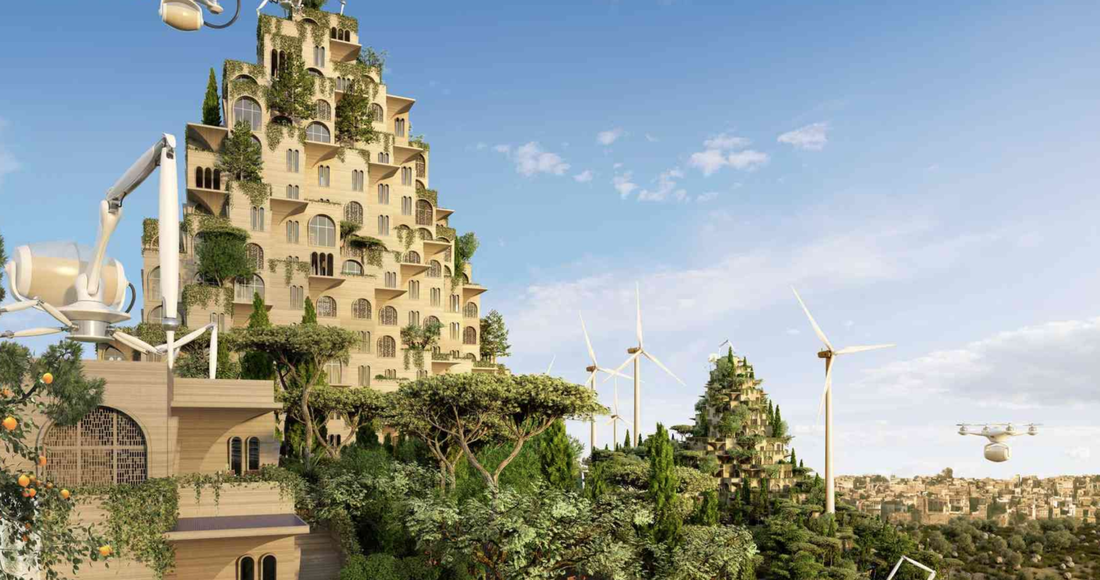
“We are going to build a new world for us to live in. Instead of large monoculture farms, we have food produce growing in amongst the houses where the community looks after it and harvests their own food. We are going to live in a world where nature thrives and lives right up to your back door. We are going to make a world where there are less roads with loud cars, it is peaceful and tranquil. A place where people live as a community, sharing the work so that there can be more leisure. With technology advancing providing new ways of creating energy we can still have creature comforts like electricity, internet and a connection to the global world. It is in this world that we are going to design and build a tree house for you and your family and friends to live.”
|
|
|
|
|
Step 1:
Research
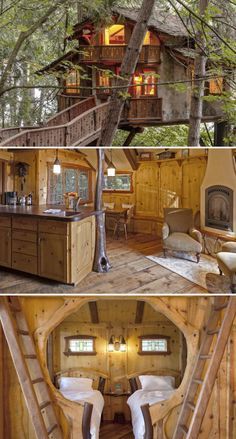
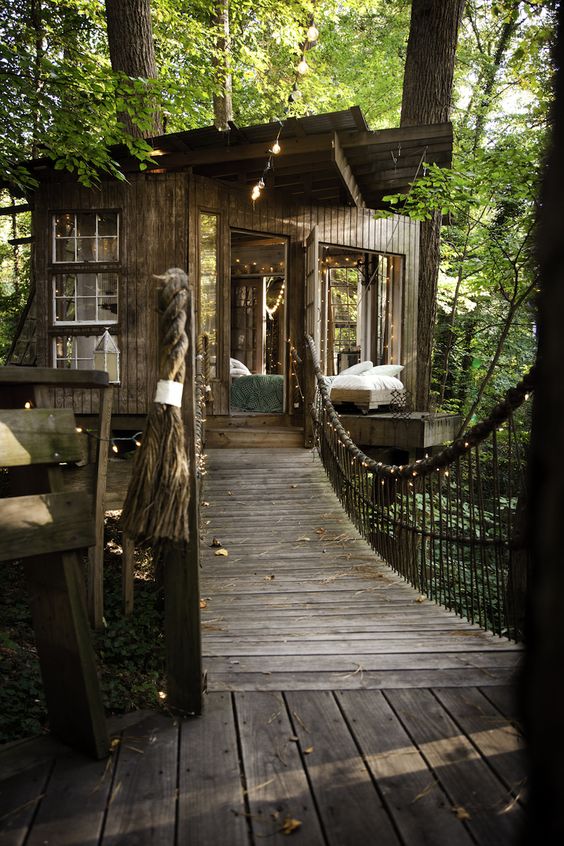
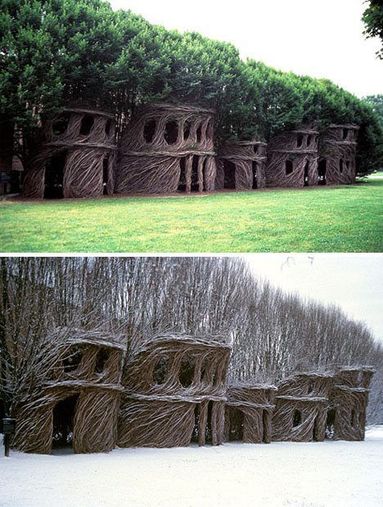
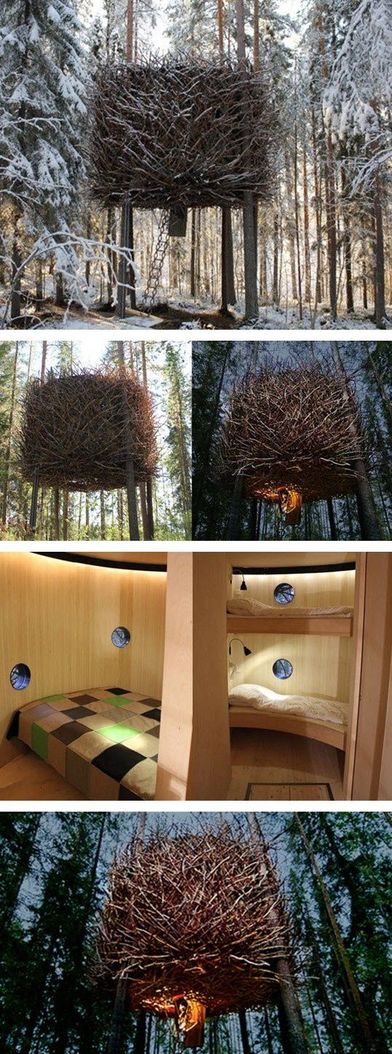
Above are some examples of liveable 'tree houses.' Research various tree homes to get a good idea of what is already out there. You can look at tree houses, tiny homes, floor plans, interiors, unusual homes, basic homes, fun homes, etc.
Remember, a focus for this task will be sustainability. So don't go too elaborate in terms of expense or unsustainable methods or materials.
Remember, a focus for this task will be sustainability. So don't go too elaborate in terms of expense or unsustainable methods or materials.
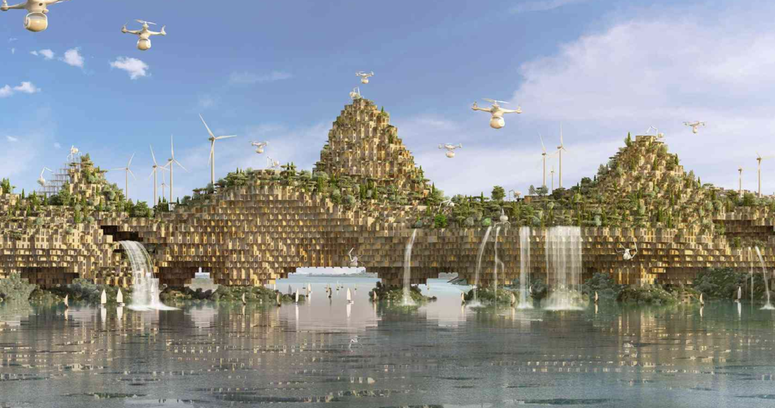
Vincent Callebaut Architectures, Paris, The 5 Farming Bridges, rebuilding 55 000 plus-energy “3D printed” housing units fighting poverty and feeding the post-ISIS Mosul, Mosul 2017, Iraq.
This construction is being created by drones using the rubble from the war torn areas nearby. Find out more at the link below:
This construction is being created by drones using the rubble from the war torn areas nearby. Find out more at the link below:
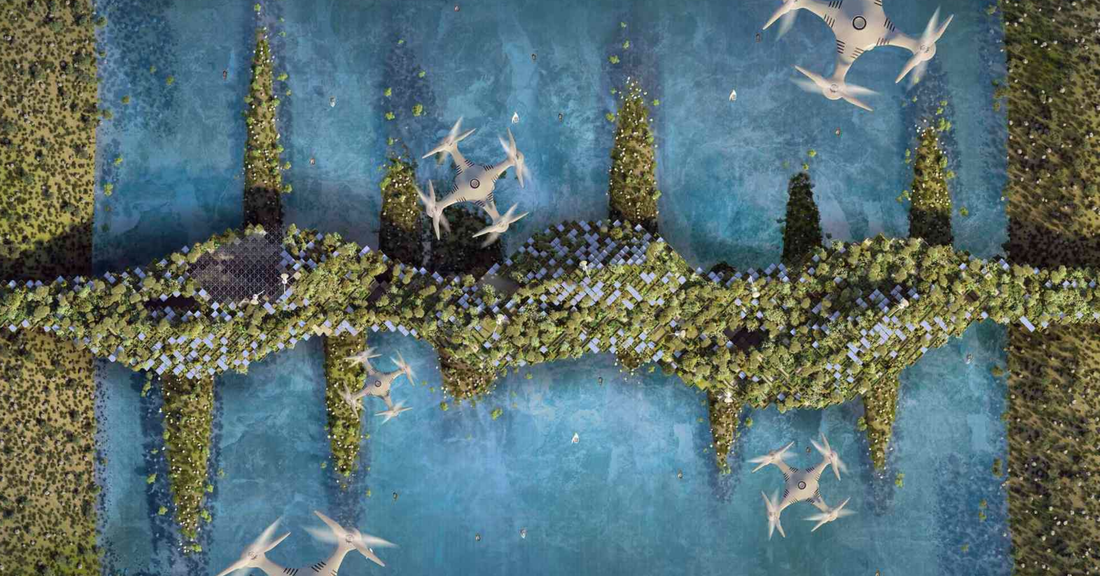
Aerial view of the bridge
|
Close up view of the bridge and the modular homes all over the structure.
|
Step 2:
Idea Generation
Before creating a design consider what a house or home actually is.
What are the basics needs provided by a structure?
How have other cultures approached the idea of shelter and a home?
How does a structure impact on the location it is placed?
Does it need to be permanent?
What are the basics needs provided by a structure?
How have other cultures approached the idea of shelter and a home?
How does a structure impact on the location it is placed?
Does it need to be permanent?
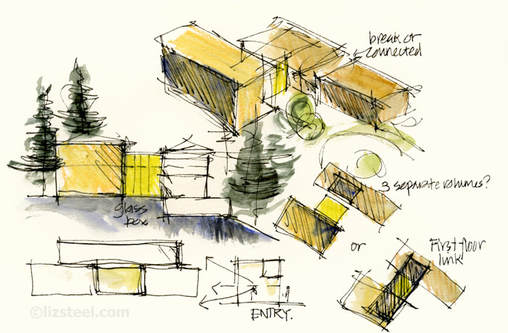
Thumbnail sketch example by Liz Steel
As you draw your design roughs remember to consider your design from different angles.
You can also create basic paper or cardboard models to test ideas too. You are not limited to only sketching your ideas! You may like to use some of the paper folding techniques learnt earlier.
You can also create basic paper or cardboard models to test ideas too. You are not limited to only sketching your ideas! You may like to use some of the paper folding techniques learnt earlier.
* The video above has fantastic tips and really good examples of professional architectural drawings, check it out!*
Step 3:
Idea Refinement and Evaluation
In this stage you are pulling your ideas together to create a more resolved design. It is the stage where you evaluate decisions and refer back to the design brief to make sure you are creating a good design for it's purpose. This is the part where you nut out the problems so that you can make a decision for the next stage.
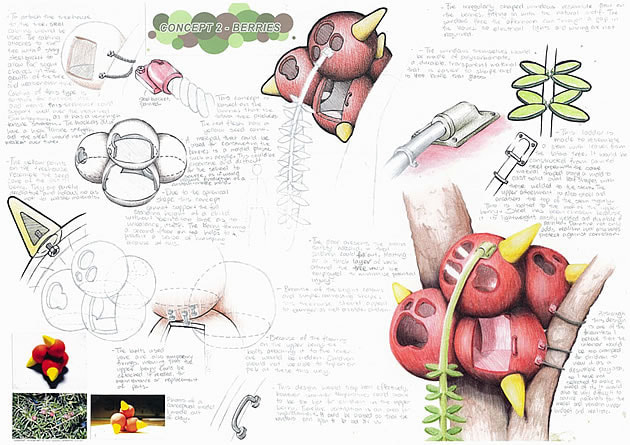
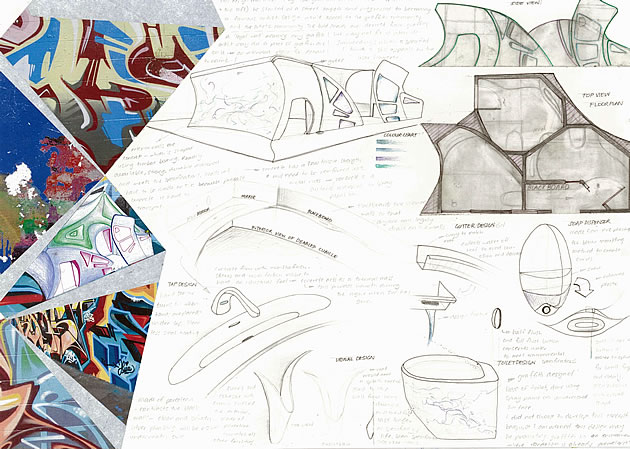
Examples from AS Art Coursework: A Guide for Students: https://www.studentartguide.com/articles/as-art-coursework-examples
Step 5:
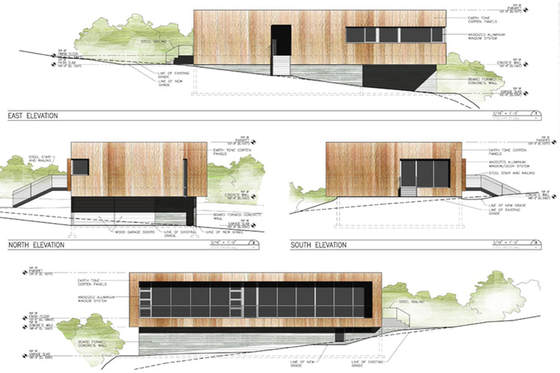
Final Design as Elevations
Using the drawing techniques you have explored in the chair design task and perspective drawing exercises you need to present your work in a finalised manner. Start by drawing the different views of your building, some may need different views if there is a feature aspect like a garden on a roof for example, you may need a top view.
If you are a hands on person, you may find it easier to start by making a model and then drawing these sketches with the model to refer to.
If you are a hands on person, you may find it easier to start by making a model and then drawing these sketches with the model to refer to.
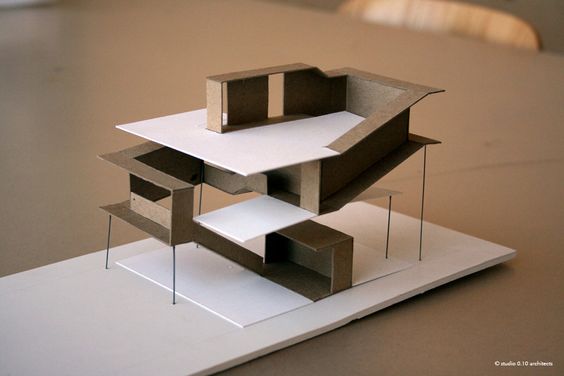
Step 6:
3D Model
Once you have a good idea of what you design will look you can make a model. This can be made from any material from cardboard to 3D printing. It is up to you and what you feel comfortable doing as to the medium you choose. The model acts to give an impression of the 3D form, it does not need to contain every detail.
If you enjoy designing buildings and wish to explore further and learn more modelling techniques consider choosing Visual Design in Year 11.
If you enjoy designing buildings and wish to explore further and learn more modelling techniques consider choosing Visual Design in Year 11.
|

|
