Fashion Design
Why is fashion important? Why learn about it?
Key Ideas:
Key Ideas:
- Identity - what are you communicating by the clothes you choose to wear?
- Sustainability - issues with environment and ethics
- History - how clothes has changed over time, the power structures
- Constraints and freedoms
Identity
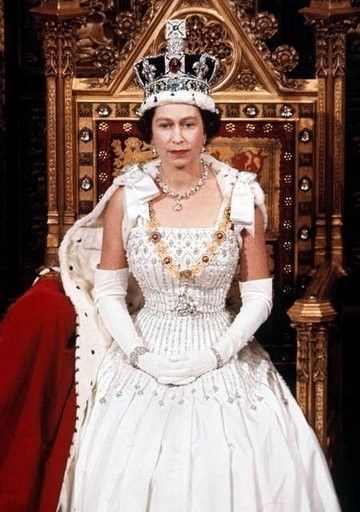
What we wear communicates something about us whether we like it or not. Clothes can be worn as a sign of wealth, power and status or it can be a purely practical function such as PPE on a work site. This common work wear of a construction site still communicates about identity as it shows their status within society, this person will generally be seen as a blue collar worker of the middle class. Compare that to the queen who's attire is opulent and extravagant, exerting power and authority.
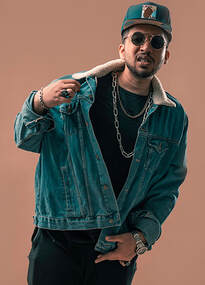
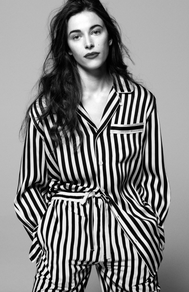
What do your clothes say about you?
What do your clothes say about you?
|
|

|
|
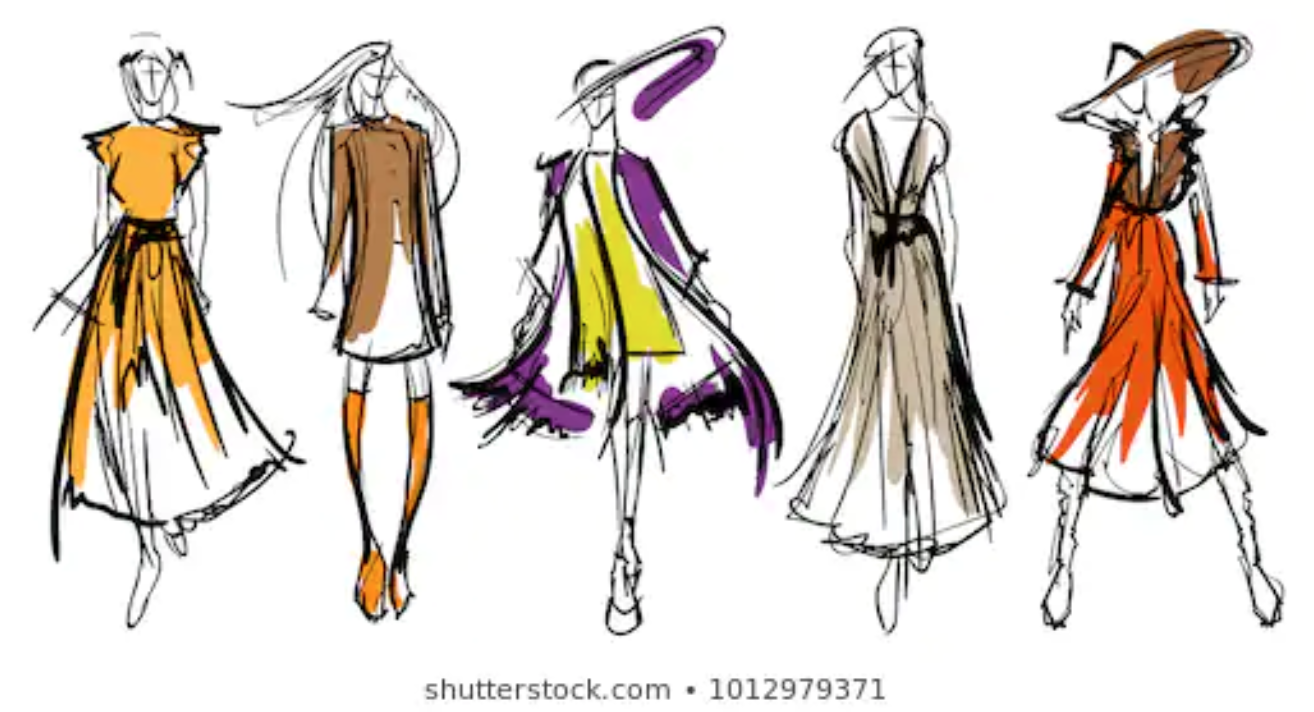
History
Notice the different between these 16th Century fashion items and the ones displayed from the video above.
A lot has changed, right?
Fashion changes over time to reflect the values, belief systems and technology available of that time.
A lot has changed, right?
Fashion changes over time to reflect the values, belief systems and technology available of that time.
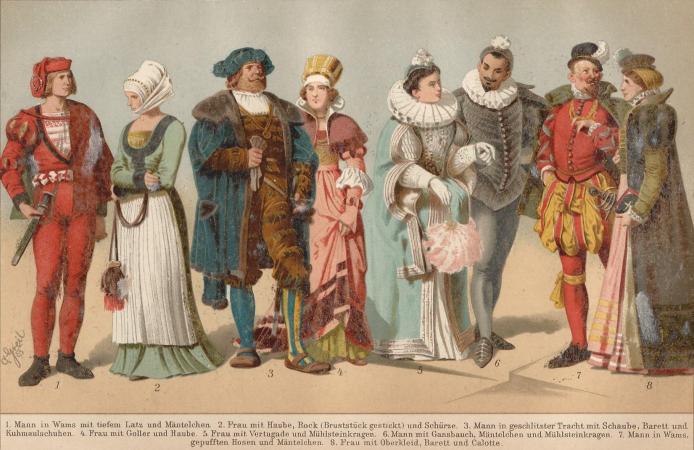
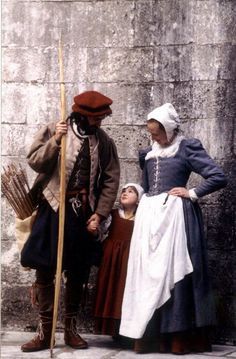
During the 16th-18th Centuries, authority, wealth and power were shown by the clothes you wore. If you had enough money you could afford the best materials and possessions and a lot of them. Therefore garments were very extravagant with a lot of fabric, layers and additions. You could also afford to have people spend a lot of time making the garments you wore.
Compare the upper class attire above, with the typical peasant wear of the lower classes below.
Compare the upper class attire above, with the typical peasant wear of the lower classes below.
Fun fact:
Did you know that stockings were originally designed for men?
Men wore stockings underneath short puffy pants, women had skirts too long for them to be seen , once women started wearing shorter skirts, stocking starting transitioning from a male clothing item to a female item.
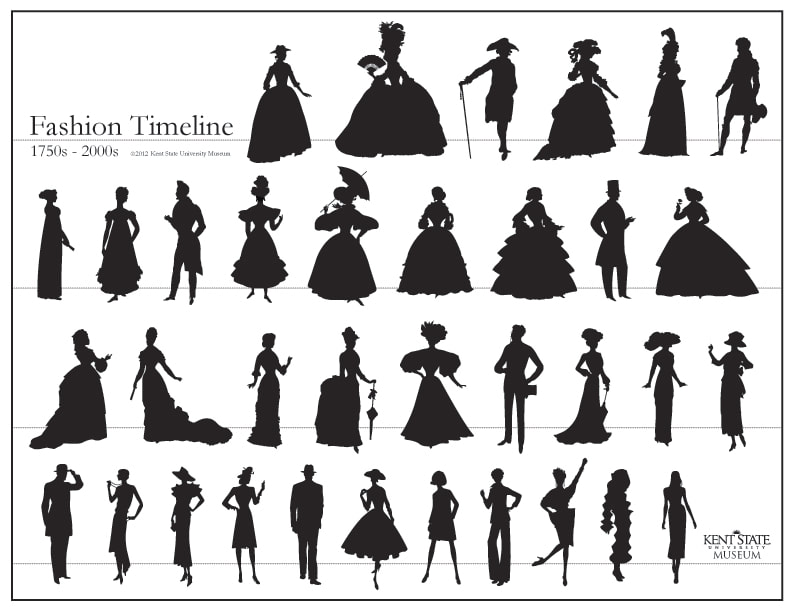
Body awareness:
The 'ideal body shape' is constantly changing throughout history. Clothes are designed to highlight the features of the body that are considered to be the most appealing for the time.
Take a look at these silhouettes from the 1700s - 2000s. All of these silhouettes are different and yet in their time were considered the height of fashion. Notice the constantly changing waist line or size of the upper or lower body? There is no such thing as the ideal body, trends come and go.
Did you know that stockings were originally designed for men?
Men wore stockings underneath short puffy pants, women had skirts too long for them to be seen , once women started wearing shorter skirts, stocking starting transitioning from a male clothing item to a female item.
Body awareness:
The 'ideal body shape' is constantly changing throughout history. Clothes are designed to highlight the features of the body that are considered to be the most appealing for the time.
Take a look at these silhouettes from the 1700s - 2000s. All of these silhouettes are different and yet in their time were considered the height of fashion. Notice the constantly changing waist line or size of the upper or lower body? There is no such thing as the ideal body, trends come and go.
Sustainability and Ethics
It can be difficult to know what to do when buying you own clothes.
Buying less and from local designers is a good start. However, as students and beginning your lives in the adult world you are unlikely to have the money to afford this.
This app can help take out some of the guess work when buying from larger chain stores.
Buying less and from local designers is a good start. However, as students and beginning your lives in the adult world you are unlikely to have the money to afford this.
This app can help take out some of the guess work when buying from larger chain stores.

Constraints and Freedoms
Clothes can act as a hinderance or they can be liberating.
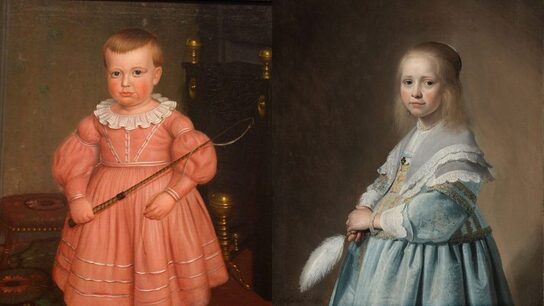
Take for instance gender norms. At birth girls wear pink and boys wear blue in our Western society. While a lot of head way has been made to break down these stereotypes, unfortunately many people base negative opinions based on gender stereotypes.
Fun Fact:
Pink was originally the colour for boys while blue was for girls, it was only in the 20th century that this tradition reversed. Mostly children in the earlier centuries wore white dresses (easy to clean with bleach) and did not wear gender specific clothing until they were around 7 years old.
It's interesting that they were more progressive in this area than we are today!
Considering a career in fashion design? Click on the button below:
Drawing the human body - Proportions
Why learn to draw the body?
So maybe you're not interested in becoming a fashion designer, but learning to draw the human body can be useful for many different areas of design. For example, graphic illustration, comics, game or character development, etc.
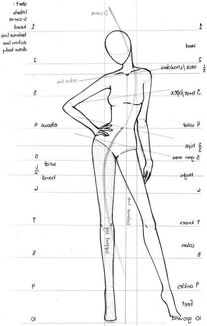
Below are two similar videos explaining how to draw the human body in proportion. This is a beginning step only and there is a lot more to learn, however this is a good place to start to turn those stick figures into a human.
Use one of the videos below to step you through drawing the human body in proportion.
The first focuses on the female form and fashion proportions while the second looks at the shape of a mannequin and refers more to the male form in realistic proportions.
The main difference between drawing a female and male body are the types of shapes used. The female form tends to be more circular and curved while the male tends to be more geometric and angular, there are no rules though as every human body is different!
So maybe you're not interested in becoming a fashion designer, but learning to draw the human body can be useful for many different areas of design. For example, graphic illustration, comics, game or character development, etc.
Below are two similar videos explaining how to draw the human body in proportion. This is a beginning step only and there is a lot more to learn, however this is a good place to start to turn those stick figures into a human.
Use one of the videos below to step you through drawing the human body in proportion.
The first focuses on the female form and fashion proportions while the second looks at the shape of a mannequin and refers more to the male form in realistic proportions.
The main difference between drawing a female and male body are the types of shapes used. The female form tends to be more circular and curved while the male tends to be more geometric and angular, there are no rules though as every human body is different!
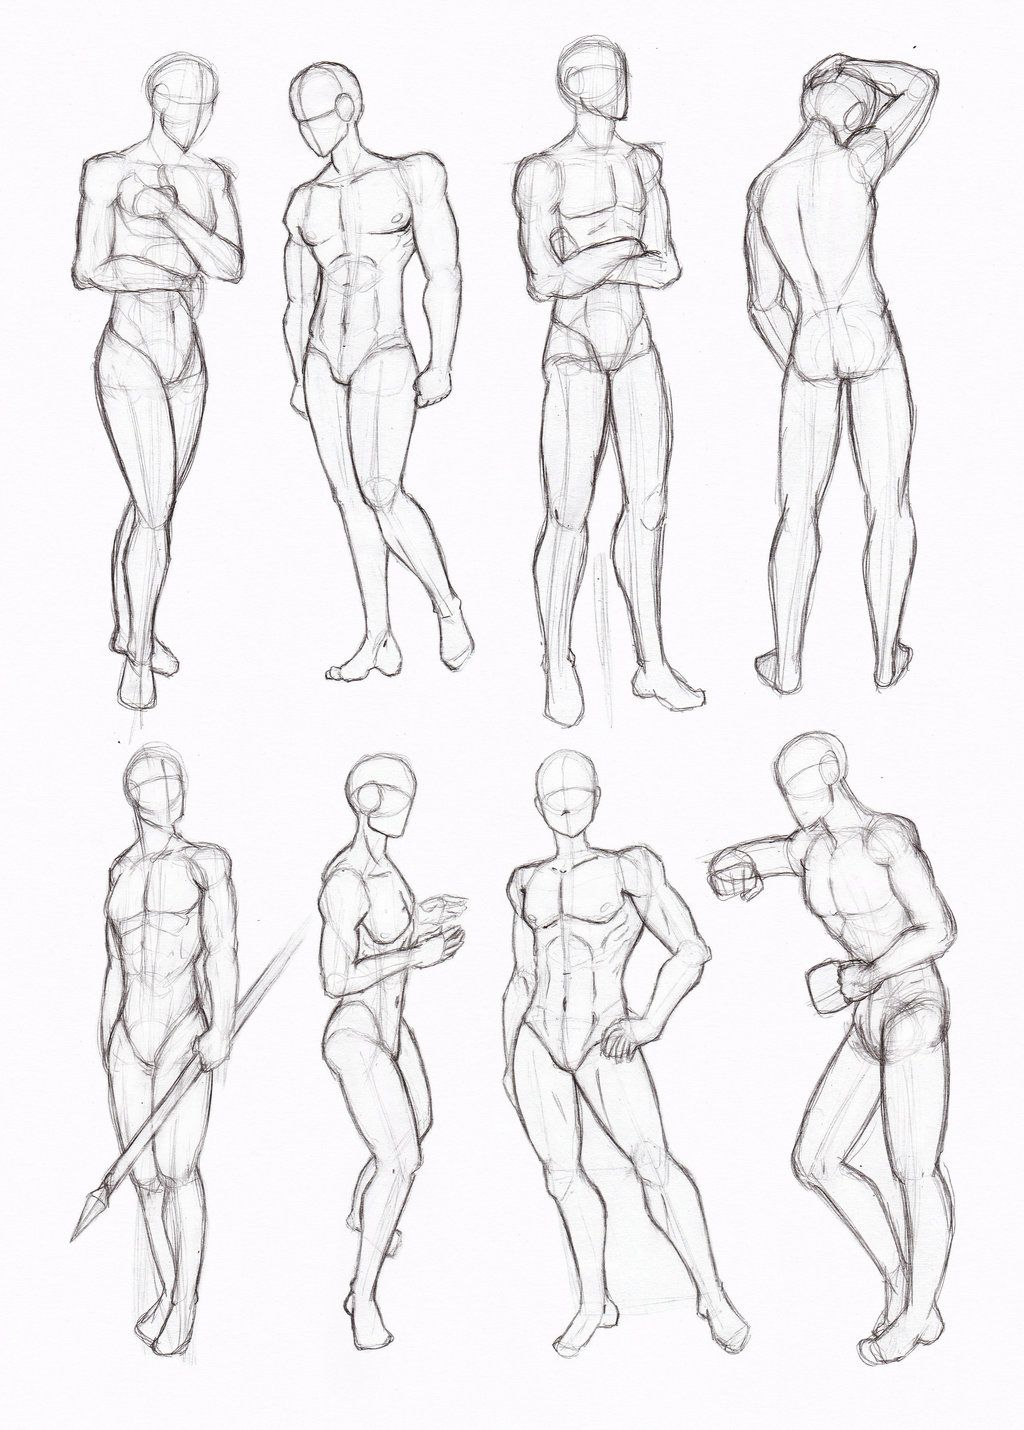
Drawing a croquis
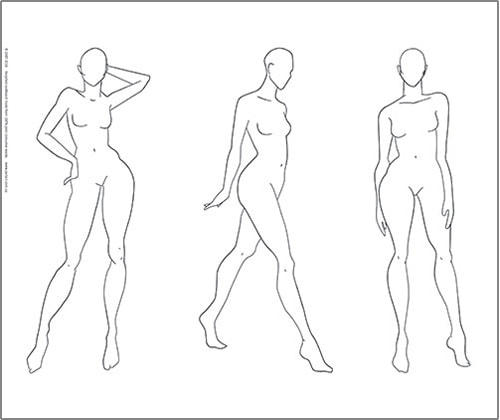
A croquis is a rough drawing or draft. Now that you have an idea for the proportions of the human body you can start to make your drawings of people look more relaxed and draw them in different poses.
On Daymap, I have provided images of people as reference images to help you draw a croquis. These models have little clothes on to help you see their bodies to help you get more accurate proportions.
If you had trouble drawing the proportion without movement, try tracing an existing croquis, there are a lot of options if you use Google.
|
|
Steps for drawing your own croquis
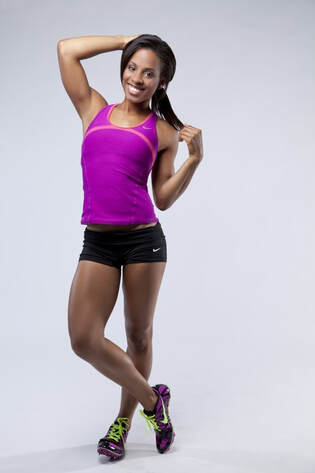
Step 1:
Find an image of a person to base the pose of your croquis on. Make sure the whole body is visible, the pose isn't too hard and the light is nice and even without the skin in harsh light or really dark shadow. 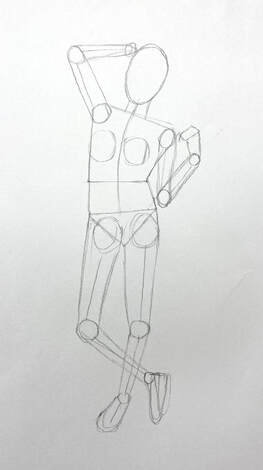
Step 3:
'Flesh out' your stick figure by drawing shapes, this is similar to what you did in the video to draw proportions, however now you are following the dots rather than using the head measurements. Watch the video again if needed. |
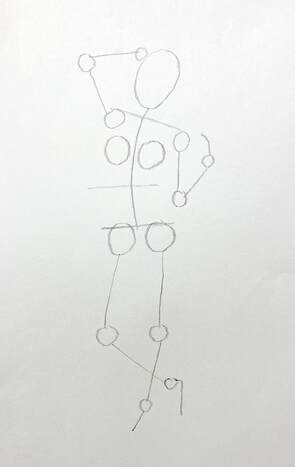
Step 2:
Place a piece of baking paper over the model and trace out the head. Then trace each joint using a circle, the shoulders, elbow, wrists, knees and ankles. You can then make a stick figure joining the dots. Use a line to mark the angle of the shoulders, waist and hips. 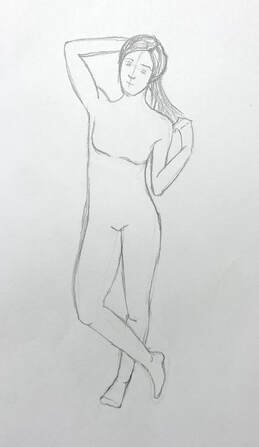
Step 4:
Place a new piece of paper over your shape sketch. This time trace the outline of your figure only, smoothing out the lines. Make sure to refer to your original image to get better proportions and lines. Eg. the front leg was wider than I thought because it is side on. I checked my drawing by placing it over the original image to see how well I went, I made adjustments to the areas where I was out. |
Step 5:
You can now use this croquis for the tasks below. Keep your reference image so that you can add details such as tone later for the final piece.
I have provided this vide below if you are struggling with the hands. Just remember though, your croquis is somewhat simplified, so don't put too much effort into the hands trying to make them look realistic that you draw attention to them. A simple hand made of a few strokes is all that is needed.
Another way to draw a croquis
Here is a more advanced video for drawing a croquis for those who wish to try or at least watch:
Your fashion ideas, summative assessment
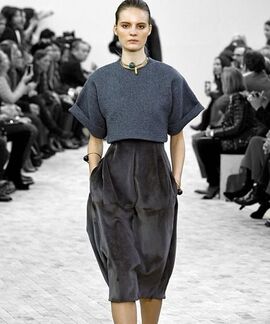
Find an image of a person in a pose you like. It will be easier if they don't have much clothes on so that you can trace their form. Try drawing garments over the top thinking about how the clothes will fall over the different body parts. Try looking at your own clothes and how they fit you to help give you an idea of how fabric looks on the body.
You can create one of the following as your fashion design task:
You can create one of the following as your fashion design task:
- Fashion illustration
- Found items
- Stencils
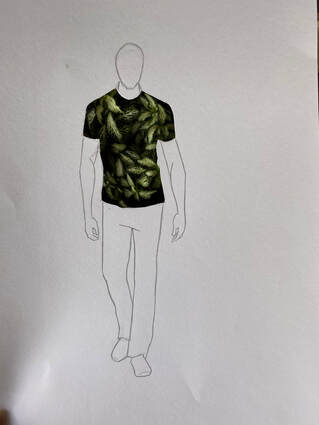
1. Fashion Illustration

|
|
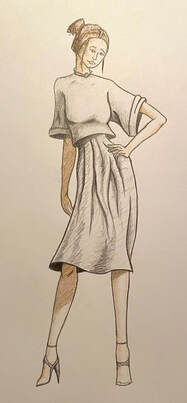
Trace a croquis to design your own garments or draw the garments from a reference image.
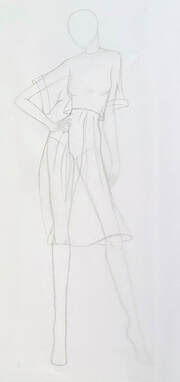
- Find a croquis that you like the pose, draw or print this onto paper. (Tip: choose a simple pose!)
- Choose a piece of fashion you would like to draw on your model.
Chosen croquis, I traced this onto paper.
|
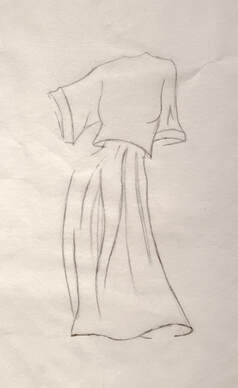
The dress I will draw onto the croquis figure, left.
|
2. Place baking paper over the top. Use a reference image of the clothing you wish to draw. Adjust the garment to suit the pose of your croquis.
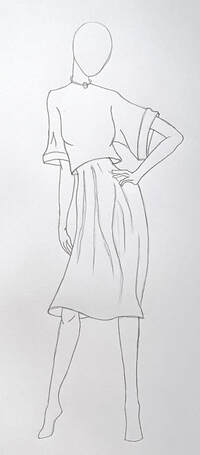
This image shows the tracing paper on top of the croquis drawing. I am using the croquis as a guide to draw the clothing.
|
This is what the clothing looks like without the croquis underneath.
|
3. Once you are happy with the clothing, you can trace the model in. Transfer your design onto paper.
Below is a video about creating shadows and shading to create a 3D effect. It is a long video, but it is worth watching to understand how to draw tone on the body as well as on clothing.
I would separate your viewing into two parts, first the body shading and then second viewing, the clothing shading.
1. Body shading: watch the beginning, follow along with the video by practising tone on baking paper on top of one of your sketches.
2. Clothing shading: Start watching at 12:50. The description shows the time stamps for different parts of the video.
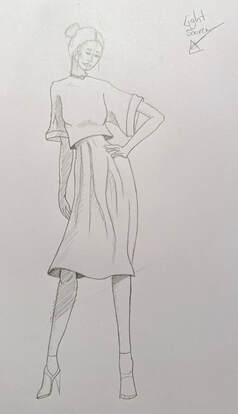
4. Choose a direction for the light source. Figure out where the cast shadows will be.
|
5. Use any medium to colour or finalise the design, E.G. coloured pencils, markers, watercolour paint, etc.
|
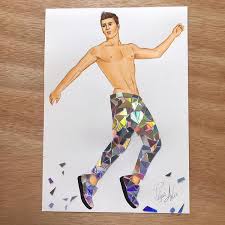
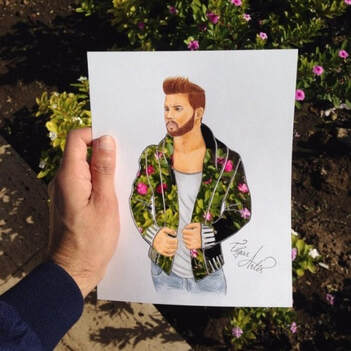
2. Found Items
The artist who created this is Edgar Artis if you'd like to look up more images for inspiration.
- Trace a figure from a good quality photo so that you can make the tone and proportions look realistic. Either adapt the clothes they are wearing to suit a found item or come up with your own garment design.
- Search for items you have at home that are ok to use whether that be food, buttons, flowers or some other form of recycled material. Experiment with your found item.
- Pay attention to the details of your garment such as the collars and folds, using your problem solving skills to figure out how to use your material to make a realistic clothing item.
- Take a photo of your design, pay attention to the lighting! This is very important, you can have a great design, but if the lighting is low, patchy or your shadow is on the page it will take away from your design.
- Submit your reference images along with your final design.
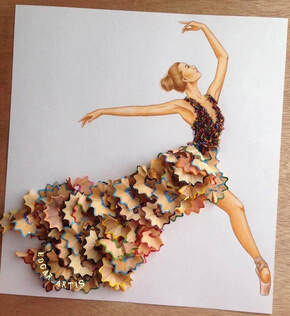
In this design you can see the person has used a sharpener to get wavy, colourful shavings. The bodice is created from crushed colour pencil leads.
|
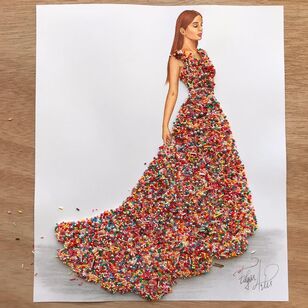
For a design like this you can draw the shape of the dress, apply glue within the dress shape and then sprinkle your sprinkles or other small found items. Once the glue dries you can remove the excess revealing your dress design.
|
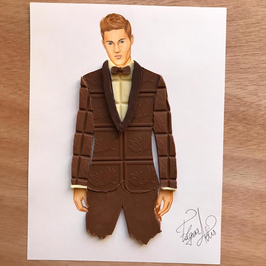
To create a design like this, draw or trace the suit shape and then cut it out with scissors. You can then use this as a template to cut out the chocolate. Another option is to use a magazine image to avoid the temptation of eating your creation before it's finished!
|
|
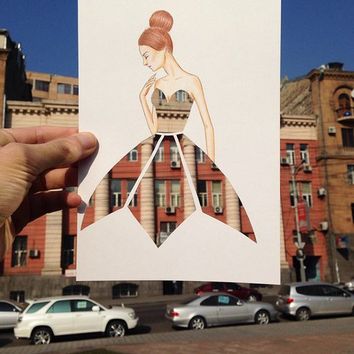
3. A stencil
|
|
- For these stencil images, draw or trace a human figure. Consider the clothing, you need to create a clear silhouette that is recognisable as a shirt, dress, pants, etc. If you try to combine a shirt and jacket it won't work as the shape will be too abstract.
I have drawn a quick outline to show you that even with a simple pencil outline this idea still works, so don't be scared to give this a try! - Once you have drawn a figure, use a scalpel or scissors to cut the chosen clothing item away creating a stencil.
- Take your stencil to something with an interesting pattern or texture such as plants, bricks, food items, patterned fabric, anything!
- Pay attention to the lighting! You want to have light going onto the front of your stencil. The best lighting I have found is outside on an overcast day as you have flat, even light with minimal shadows. Pay attention to the shadows as it's easy to get your own shadow falling over the stencil.
- Experiment by taking lots of photos to try and get a really good one. Pay attention to how you are holding the paper, where the light is falling and what you can see through the stencil.
|

|
