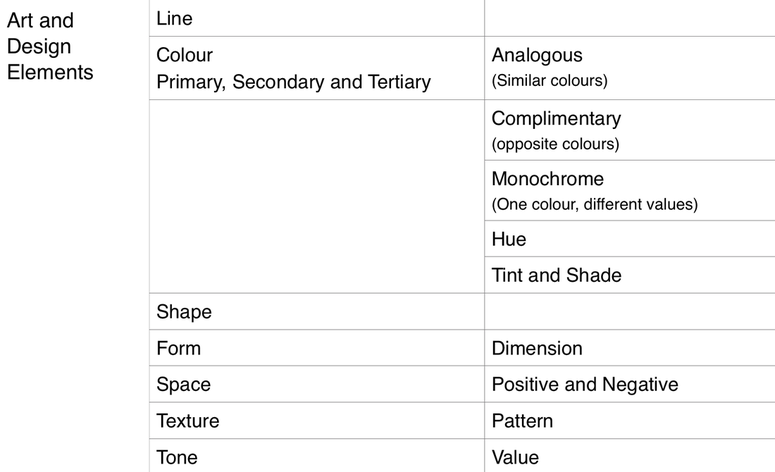
Graphic Design on a Product
Learning Context:
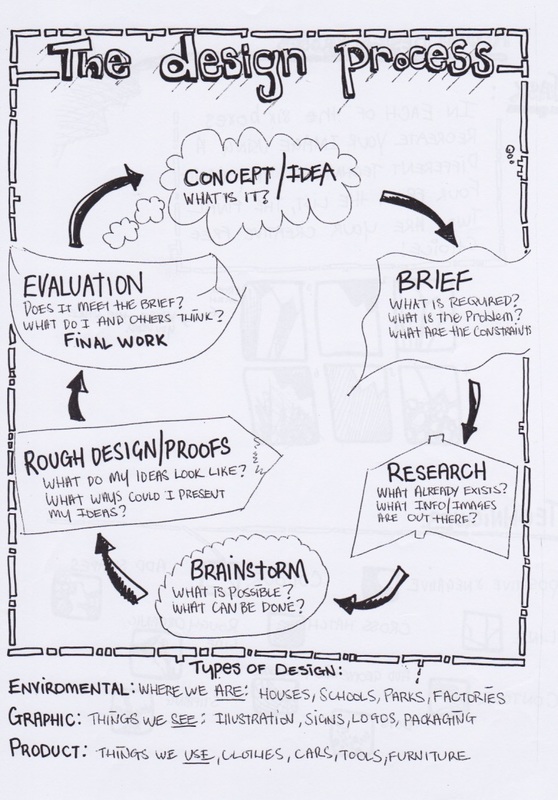
You are to recap the design process and the Art/Design elements from Year 8. Emphasis of the design process which is: research, idea generation (using broad ideas, possibly group generated), refinements, evaluation and final product. This should be presented in a neat and ordered way, with an emphasis on craftsmanship.
Purpose:
(What is being assessed)
- Documentation of creative visual thinking and/or problem-solving processes. (Evidenced through a complete design process) PA3
- Application of technical skills with media, materials, and technologies to communicate visual ideas in resolved work(s) of art or design. (Evidenced through design roughs, refinement and final design) PA4
- Use of visual arts language to interpret and respond to works and their contexts. (Evidenced through annotations) AR2
- Evaluation of own practical work. (Evidenced through annotations) AR3
Process:
List of order:
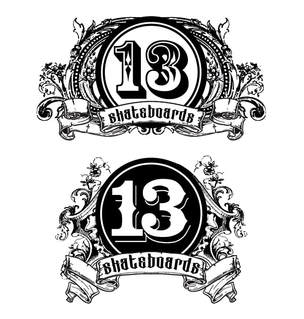
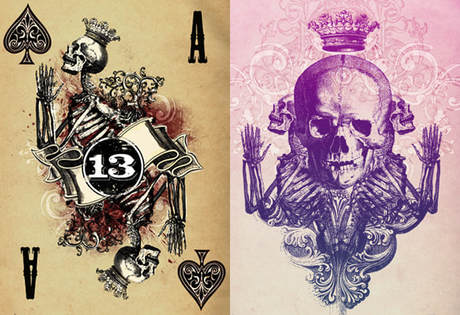
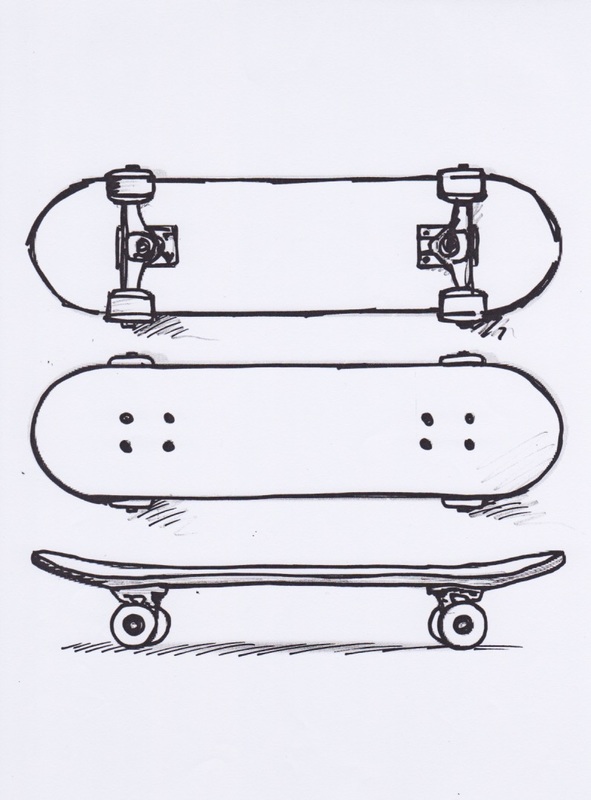
- Research existing graphic designs used on skateboards or other product (See images below). You may wish to include other inspirational imagery not related to skateboards.
- Annotate the images collected to state why you chose these designs. Use design language. Eg. You think the colour scheme is effective, not just that you like the design. Be specific in identifying elements you are considering incorporating into your solution.
- Idea generation. Create quick thumbnail sketches to create design roughs.
- Annotate in order to evaluate your initial designs. Which designs will you work further on and why?
- Idea Refinement. Refine your chosen design/s. Choose and combine successful elements to create variations such as, size, font, colours, etc.
- Create a final design that is neatly presented and show craftsmanship.
- Evaluation of designs to judge the design fits the brief.
List of order:
- Design Brief
- Research
- Idea Generation
- Idea Refinement
- Evaluation
- Final Design
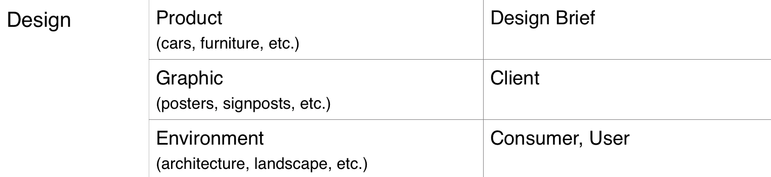
The Design Brief
The Client
Clegane-enviro is a locally based fashion business that incorporate the work of local artists and designers in their products with a strong focus on visual branding that captures the natural environment. Clegane-enviro create a range of products including tote bags, caps, mobile device covers, skateboards and fashion products made of organic materials.
The Target
The main audience for the product is young people aged 12-18 with the products occupying a "boutique" quality and being sold through the on-line store. The client while wishing to include visual reference to the natural environment would prefer something subtle or abstract wherein the subject is not easily identifiable, but still present upon further inspection.
The Project
The client requires a pattern or visual image that can be utilised to cover or "skin" various objects in their design range. The illustration should be presented on A3 paper with the medium the artist's choice. The client has requested that the pattern incorporate some element of the natural environment and be presented as though it would appear on a product from the companies range. Colour is also the artist's choice and the client has requested that no text be used.
boutique
buːˈtiːk/
noun
buːˈtiːk/
noun
- a small shop selling fashionable clothes or accessories.
- a business serving a sophisticated or specialized clientele.
Step 1:
Research:
Look at as many pictures as possible of graphics on products. Collect the images that inspire you either in a folder on your computer or use Pinterest and create a new board for this task. You can use google images, Pinterest and take photos of products that you see around you and in the shops.
Collect images of the natural world that inspire you as well to assist you with your own designs later.
The choice of images should not be a random decision, but focused on what you like aesthetically or inspires you in some way.
You do not have to like everything about the image! You might only like an aspect of it, but you are keeping the image for a reason.
You may like to use Pinterest to collect and store your images. You can annotate the images on this application. This way you can make a new board for each task during the semester and have all of this step (research) in one place. If you do this, make sure you label which images you annotate so I can find them!
Keep a bibliography of the resources used!
Write the name of the designer, artist or company wherever possible to acknowledge the maker.
Annotate:
Annotation is simply the process of writing notes and labelling work so that it can be understood and to record your thoughts. You should be discussing what design decisions were made for your design roughs through analysis, interpretation and evaluation. This process is aimed at understanding which design ideas are more suitable for the function of the poster. The posters that you choose to continue with should be well considered before the refinement stage.
Annotate the images you have found to explain why you have chosen them.
Annotate the images you have found to explain why you have chosen them.
- Use design terminology.
- Analyse and interpret the elements and principles within the products / graphic /natural images.
Analysis:
Is the process is breaking down and discussing the use of design elements and principles. It is the act of analysing the forms utilised in the work of Design. It is a close inspection of the designer's use of aspects such as colour, shape, line, mass, and space.
Interpretation:
Interpretation is about understanding how the design elements and principles create meaning, message and or mood in a design.
Do not use statements like:
Do use statements like:
My examples:
- 'I like / do not like this design'
- 'This design is pretty' or 'I like the colours'
- 'This design is interesting'
Do use statements like:
- 'The primary colour scheme creates a happy mood which appeals to me'
My examples:
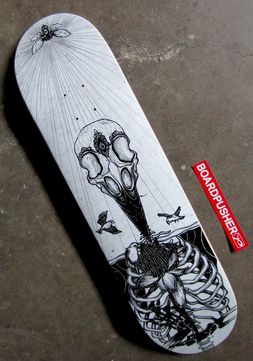
Chritina Chung
This design appeals to me because of the illustrative nature of the image. There is a dark, mood because of the style and the way the insect has radiating lines and the skull has a motif between it's eyes, reminiscent of Indian culture.
|
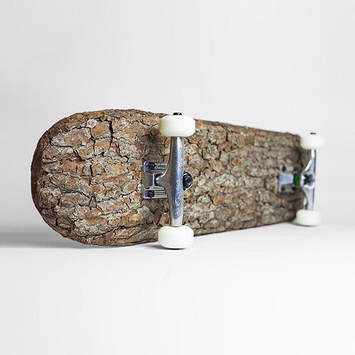
French artist Christophe “Mr. Plant” Guinet
This design is different as it is not a graphic, but rather the material itself. The bark has been left on the wood to provide texture and a sense of the natural.
|
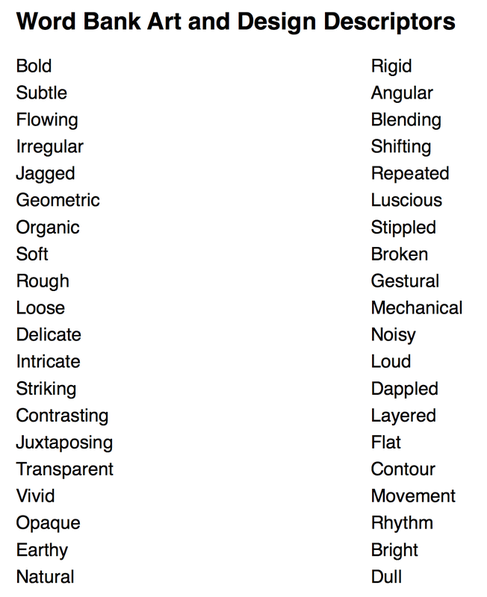
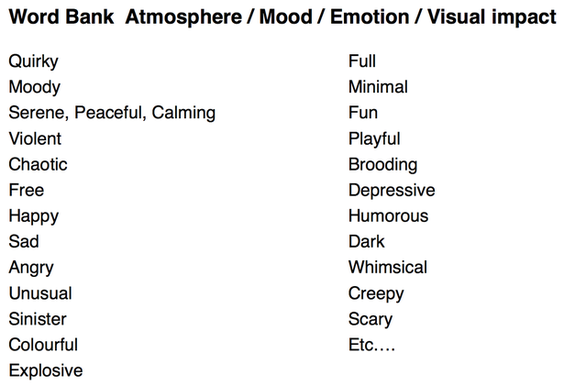
Design terms to use
Word Bank:
Use these descriptive words below to help you to describe how the design elements and principles have been used.
Step 2:
Idea Generation
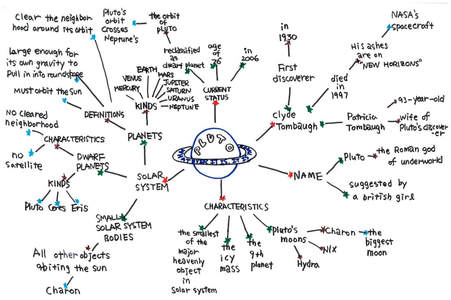
Now that you have researched various design, collate your data into a mind map to record and show connections with the information.
Ideas for mind map headings:
Ideas for mind map headings:
- Skateboard
- Users
- Places
- Natural inspiration
- Target Audiences
- Function
- Materials
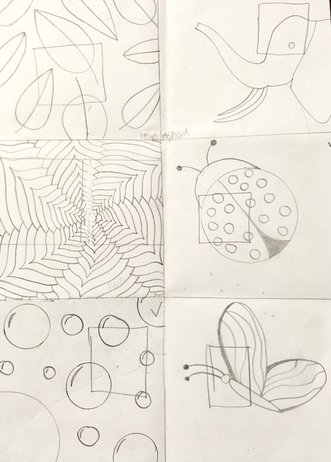
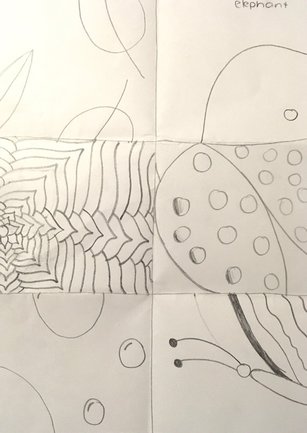
Using the images and brainstorming for inspiration, come up with as many design roughs / thumbnail sketches as possible.
Create quick thumbnail drawings of ideas for a graphic. The emphasis here is on quick drawings as you want to get a lot of ideas drawn in a short amount of time. Don't worry about how you will make the final design yet. Come up with an idea and discuss with me potential ways of creating. Tracing and the use of photos will help you.
Trace imagery to help you speed things up if needed.
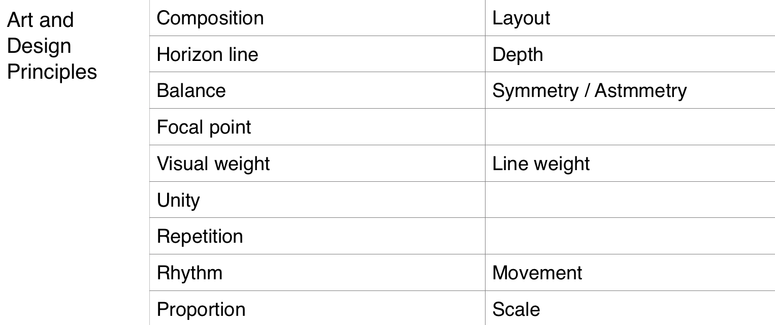
You need to stretch your imagination and creative ability to come up with as many ideas as possible. In these design roughs / thumbnail sketches consider the design principles:
Make labels, notes and dot points to show your design thinking in this process.
Again, analyse and interpret.
Analysis is the use of Design elements and principles.
Interpretation is the use of elements and principles in order to create meaning.
Create quick thumbnail drawings of ideas for a graphic. The emphasis here is on quick drawings as you want to get a lot of ideas drawn in a short amount of time. Don't worry about how you will make the final design yet. Come up with an idea and discuss with me potential ways of creating. Tracing and the use of photos will help you.
Trace imagery to help you speed things up if needed.
You need to stretch your imagination and creative ability to come up with as many ideas as possible. In these design roughs / thumbnail sketches consider the design principles:
- Composition and Layout
- Balance / Visual weight - symmetrical, asymmetrical, radial, crystallographic
- Emphasis / Contrast
- Proportion / Scale
- Movement / Rhythm
- Repetition / pattern
- Unity / Discord
- Variety
Make labels, notes and dot points to show your design thinking in this process.
Again, analyse and interpret.
Analysis is the use of Design elements and principles.
Interpretation is the use of elements and principles in order to create meaning.
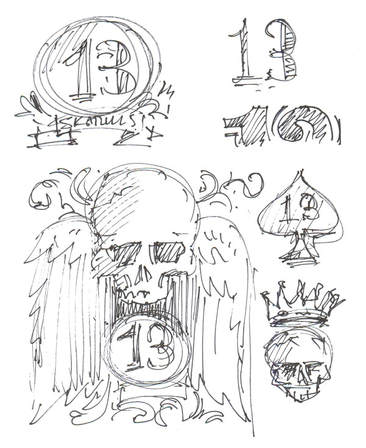
Design roughs created by VideoCreative
Step 3:
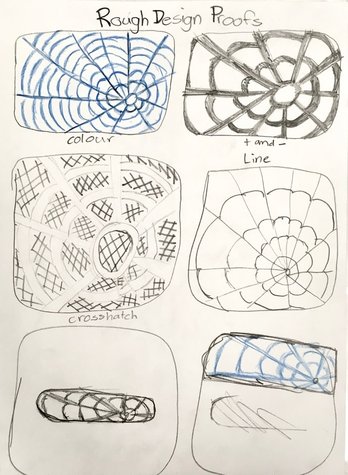
Idea Refinements
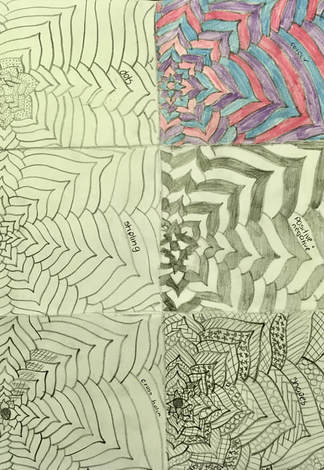
In this stage you are not making new ideas, but rather putting your design ideas together by choosing the best components. You will also experiment with the layout, size or scale and the colour scheme.
In this stage you may also experiment with medium if it is suitable for your design idea. For example you may wish to create a textured background. You could use many mediums to achieve this. Make sure you keep all experiments to include in your folio.
In this stage you may also experiment with medium if it is suitable for your design idea. For example you may wish to create a textured background. You could use many mediums to achieve this. Make sure you keep all experiments to include in your folio.
Label which technique you have used next to your design rough. Design roughs are used to test out ideas and make refinements before creating your final design. Set out neatly in your book.
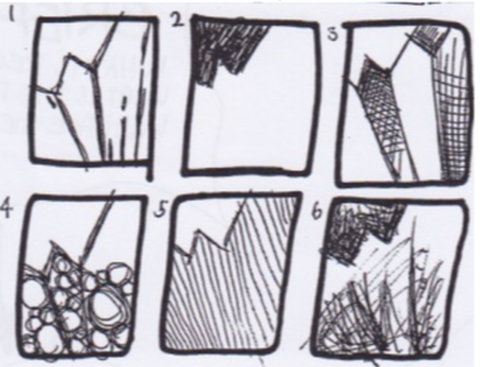
Below is an abstracted leaf example. It has been abstracted by zooming in and cropping the image to only reveal a small detail. You may try this to help you create an abstracted image.
Below is an abstracted leaf example. It has been abstracted by zooming in and cropping the image to only reveal a small detail. You may try this to help you create an abstracted image.
|
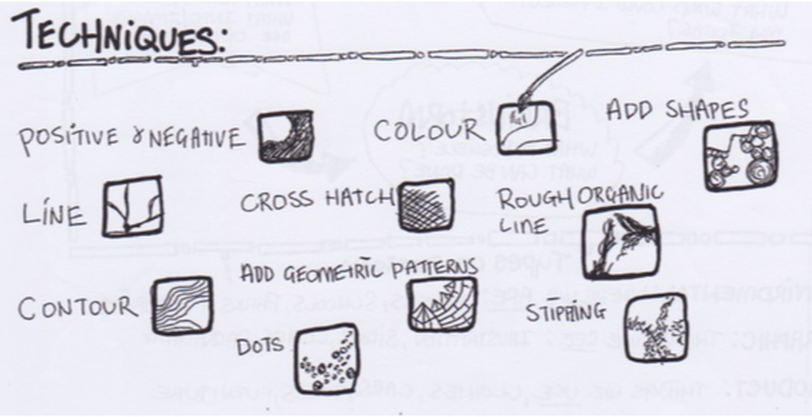
Line
|
Positive and negative space
|
Crosshatching
|
|
Dots / Shapes
|
Line / pattern
|
Free choice
|
|
|
Refinements of logo and image by VideoCreative
Step 4:
Final Design
Use the A3 product templates to apply your design to. This is your good copy and should display good craftsmanship.
Before drawing consider:
The design should not change much here, only tweaks to small details. In this stage you should be focused on creating a high quality finish. You can use any medium, although it is a suggestion to use a medium you have tested or worked with before.
Eg.
Before drawing consider:
- Does your design meet the brief?
- Is this the best design you can possibly come up with?
- Have you exhausted all other possible ideas before choosing this one?
- What is your product? Is it flat or round? If it is round, or spherical, curve your design to suit the surface of your product for realism.
The design should not change much here, only tweaks to small details. In this stage you should be focused on creating a high quality finish. You can use any medium, although it is a suggestion to use a medium you have tested or worked with before.
Eg.
- Photoshop or Illustrator
- Tracing images (you don't need to rely on good drawing skills, tracing is valuable, esp. as a time saver!)
- Paint, watercolour or acrylic
- Ink
- Pencils and pens
- Charocal
- Collage (a great option for this task either by hand or on the computer.)
Final Product Design by VideoCreative on multiple products
Step 5:
Evaluation
Evaluation is the judgement of how successful or unsuccessful a design work is. When evaluating, it is not about whether you like or dislike, but rather, do the design elements and principles come together successfully to create an aesthetic, functional and or meaningful design work.
Use design terms in your evaluation
Write or organise an oral presentation with your teacher for a final evaluation.
Structure:
Include a word count for this step.
Use design terms in your evaluation
Write or organise an oral presentation with your teacher for a final evaluation.
Structure:
- Evaluation of use of design elements and principles:
- Evaluation of meaning and suitability to the design brief:
- Improvements based on the above questions:
Include a word count for this step.
Step 6:
Presentation of all work (Folio)
It is important to make sure your folio work is presented well, displaying a clear progression of the design process. This is a chance to see if any work is missing, or there are holes in the process - go back and work on this section if there is.
In the senior years you are expected to create a task called the Folio, which is 40% of your overall grade. Get used to this process now as many students find it challenging when they get to Year 11 and 12.
You may present your work through digital or hardcopy.
If digital you must present as a PDF format, include a link to your Pinterest board. Your work should still present well with heading, images and annotations placed neatly, in order and with thought on each page.
If presenting work as a hardcopy. Your work should be inside a folder. You may need to trim tests, cut and paste work so that it flows as a document in the correct order and with headings.
Upload your Pinterest link to Daymap.
Present your work in the order listed here and create a title for each page:
- Research
- Idea Generation
- Idea Refinement
- Final Design
- Evaluation
- Bibliography
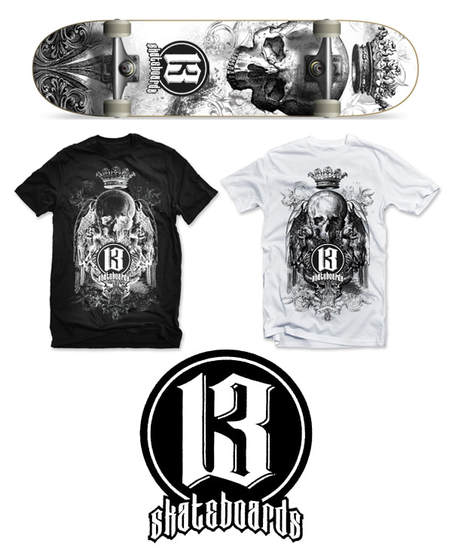
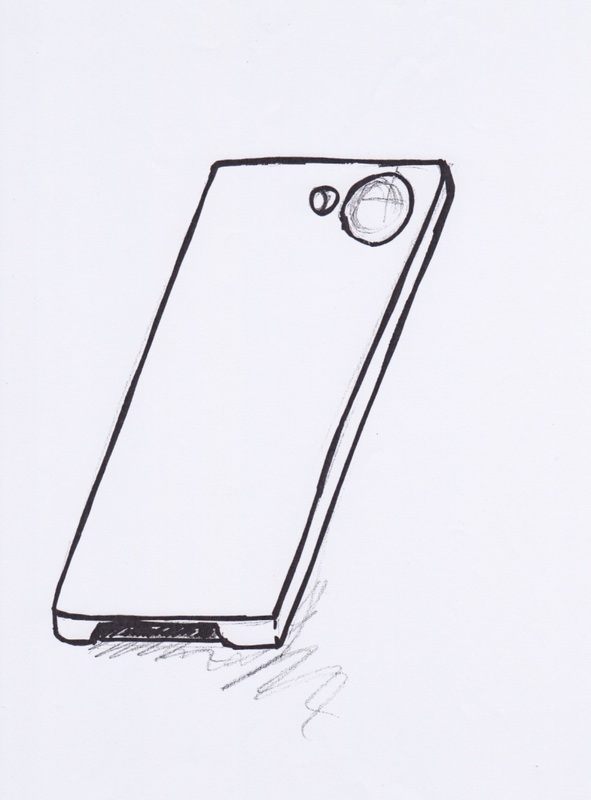
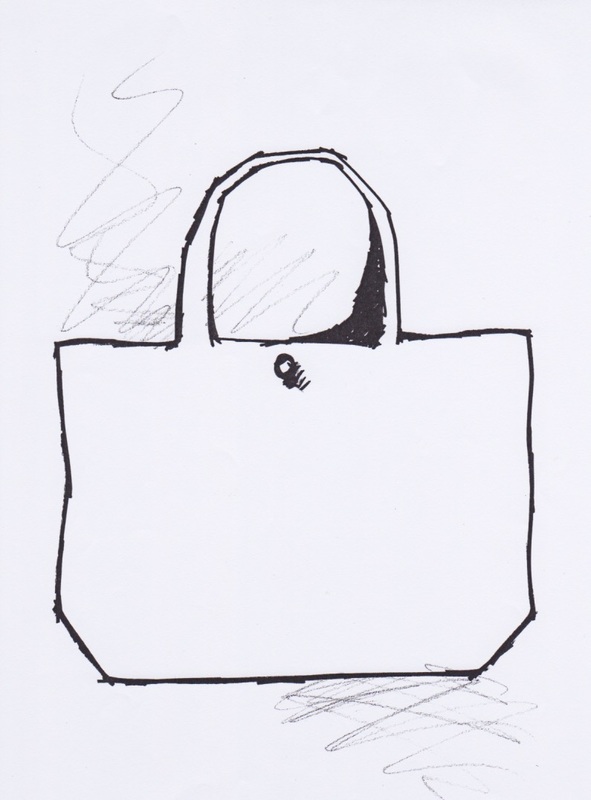
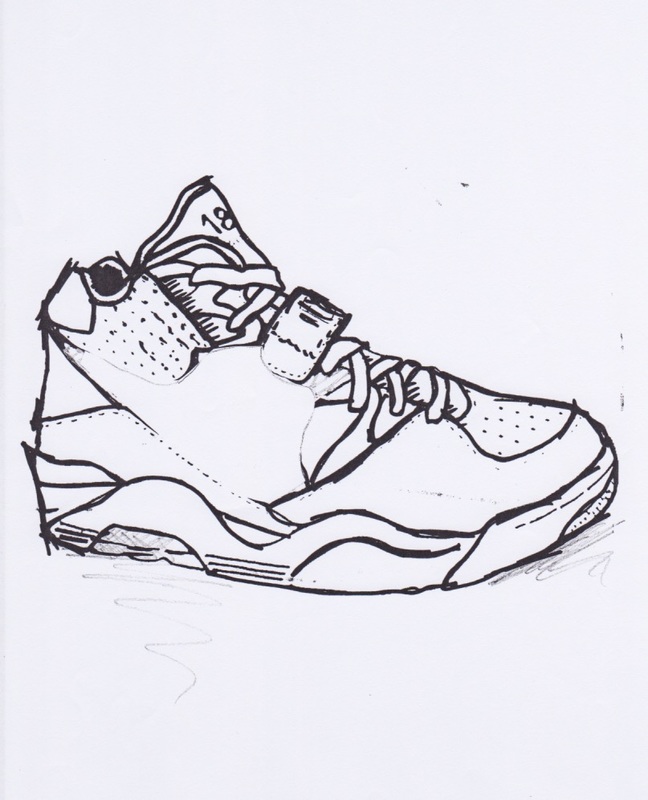
The products:
This is the product range of Clegane-enviro. You will need to apply your final design to at least one of these products. Think about how your design can best suit the form and space of these products. The design may not be applied in the exact same way to each product. Consider positioning and scale.

|
|
|
|
|
Student Examples:
(These are examples from a year 8 class as the task has changed year level)
Idea Generation
|
Close up of ideas by cropping the image in order to abstract the subject.
|
Experimentation with chosen idea
|
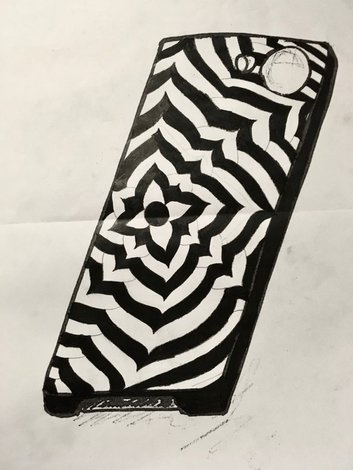
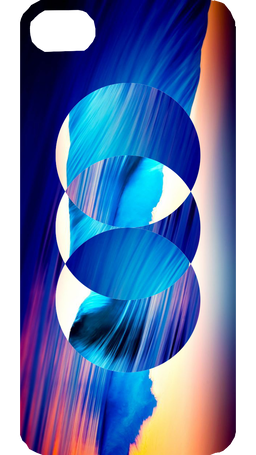
Final Design on phone cover
|
Evaluation
"I used positive and negative space as my base element. The contrast between black and white helps to make the pattern in the flower stand out and makes a bold and flowing image. There is a radial repetition of shapes almost like an explosion. This design is similar to the work of Op artists, who use strong use of repeating shapes to create an optical illusion, giving a sense of movement."

Idea Generation
|
Experimentation with chosen idea
|
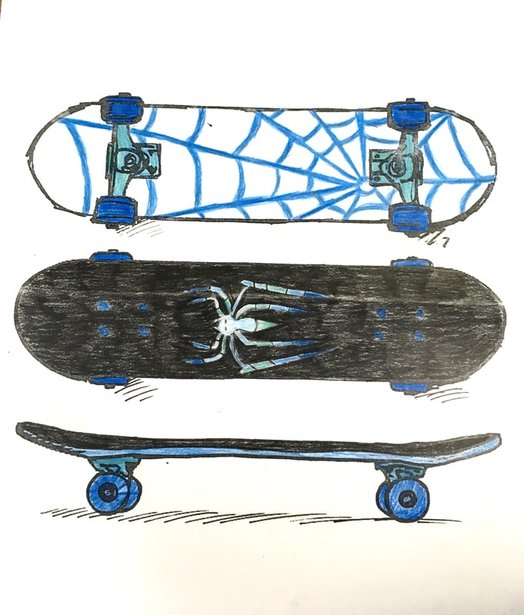
Final Product Design
Evaluation
"My design is very successful because of the bold blue lines. I have used an analogous colour scheme of blues and greens. My design follows the natural theme outlined in the design brief with some abstraction of the spider. It has a good balance of positive and negative space with a central placement of the spider on the top side of the board and an asymmetrical placement of the web on the bottom. One side of the board is black while the other is white giving contrast which would look good when doing tricks on the board as it flips around."