Product Design: Shoe
Learning Context:
You will begin the task by looking at a case study to better understand the fashion design industry. You will create a cardboard model to understand the parts of a shoe and construction processes. Continue your folio work to include visual reference imagery for creative design solutions in the idea generation phase. Orthographic drawings are created to display the final product.
Purpose:
(What is being assessed)
- Documentation of creative visual thinking and/or problem-solving processes. (Evidenced through a complete design process) PA3
- Application of technical skills with media, materials, and technologies to communicate visual ideas in resolved work(s) of art or design. (Evidenced through model and orthographic drawings) PA4
- Research and acknowledge sources to explore and develop insights into aspects of the visual arts. (Evidenced through the case study) KU4
- Analysis and interpretation of works of art or design from different contexts. (Evidenced through annotations) AR1
- Use of visual design language to interpret and respond to works and their contexts. (Evidenced through annotations) AR2
- Evaluation of own practical work. (Evidenced through annotations) AR3
Process:
- Research a case study.
- Construct a cardboard model of a shoe.
- Explore imagery of unrelated imagery for creative design solutions. Afterwards, observe existing shoe designs.
- Idea Generation. Create quick thumbnail sketches to create design roughs.
- Annotate ideas in order to analyse, interpret and evaluate your initial designs using design language. Which designs will you work further on and why?
- Idea refinement. Refine your chosen design/s to improve.
- Create a final design using an orthographic presentation that is neatly presented and shows craftsmanship.
- Evaluation of the final design.
- Present your work in the order listed here and label each page.
- Research (case study, model and imagery)
- Idea Generation
- Idea Refinement
- Final Design
- Evaluation
Stage 1: Understanding
Research
1. Research a shoe designer, you will have a choice of papers to read from Footwear Design by Aki Choklat.
Highlight what you think are the important points and make notes. Report your findings to the class, 3 min.
Highlight what you think are the important points and make notes. Report your findings to the class, 3 min.
- Where do they get their inspiration from?
- How do they go about designing their shoes?
- Any interesting facts or findings.
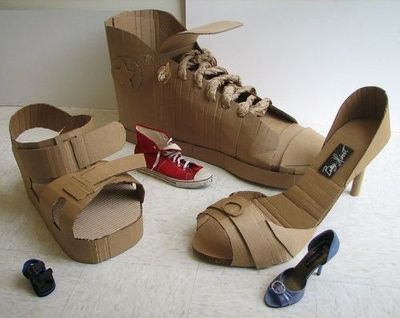
2. Cardboard Model
By constructing the shoe yourself, you are able to see how the shoe comes together. You will see how two dimensional shapes can be folded and moulded into three dimensional forms.
Shoe makers and seamstresses use a plan called a 'pattern,' to start the making of their shoes and clothes.
By constructing the shoe yourself, you are able to see how the shoe comes together. You will see how two dimensional shapes can be folded and moulded into three dimensional forms.
Shoe makers and seamstresses use a plan called a 'pattern,' to start the making of their shoes and clothes.
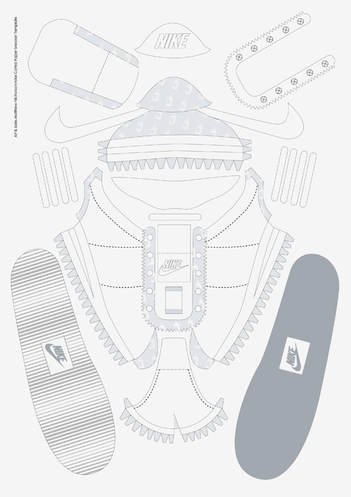
This is a pattern for a Nike sneaker
Ergonomics
Ergonomics, also known as comfort design is all to do with how a consumer or audience uses or interacts with a product and how well the product it suited to it's user. For example, a designer would consider how a person would sit on a chair they are designing. They may consider many factors for making a chair comfortable or usable. Such as the height, depth, the back rest and the way a material feels.
What would you need to consider for ergonomics when designing shoes?
What would you need to consider for ergonomics when designing shoes?
Function
What is the function of shoes?
Brainstorm a list of different types of shoes
Do they all have the same function or do they differ?
Give some examples for the different functions that people seek from shoes.
Brainstorm a list of different types of shoes
Do they all have the same function or do they differ?
Give some examples for the different functions that people seek from shoes.
Stage 2: Your Design
Step 1:
Mood board
You are not allowed to look at shoes in this stage!
If you look only at shoes that already exist then you are regurgitating old designs. To create new ideas you need to look elsewhere. You need to push and challenge yourself and develop new ideas.
You are not allowed to look at shoes in this stage!
If you look only at shoes that already exist then you are regurgitating old designs. To create new ideas you need to look elsewhere. You need to push and challenge yourself and develop new ideas.
In a mood board you aren't looking at the subject perse, but the message or mood the subject projects.
It is all about the mood, textures, colours, message, etc.
Don't just use google images. Use photos you have taken yourself, look through magazines, etc.
Think about your layout.
Don't just randomly place your images on a board! A good layout will help communicate to your audience, making your ideas and concepts stronger.
TIPS FOR MAKING AN IMAGE BOARD (www.elancreativeco.com)
- I like to use at least five images, but no more than ten (including color blocks)
- I often use moodboards to make color palettes; I do this using the Eyedropper Tool and take colors directly from the images
- I always make sure the images are aligned and I try to leave the same amount of white space between them
- You can use horizontal and vertical images, and if you want to emphasize something (like a pattern) you can use a circle or hexagon
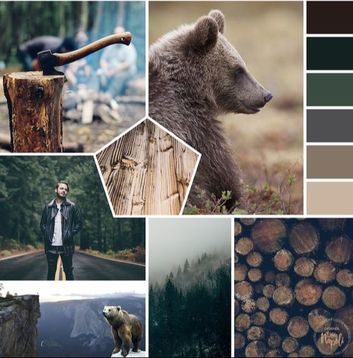
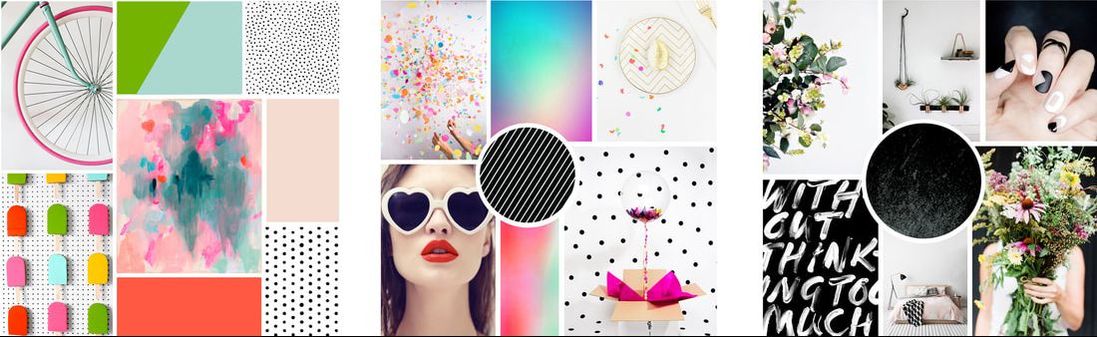
Image from: http://lovepluscolor.com/blog/how-to-create-a-stunning-mood-board/
Step 2:
Idea Generation
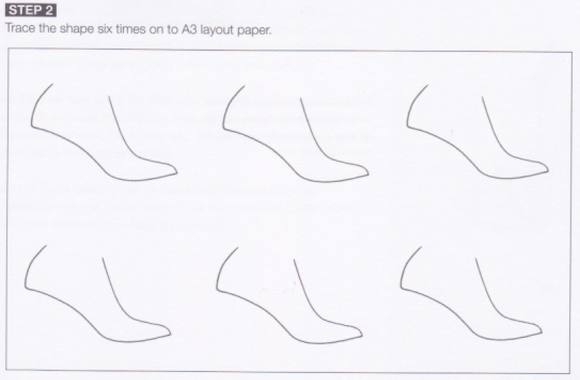
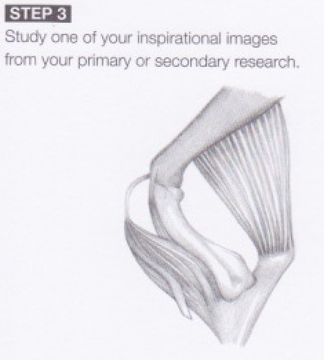
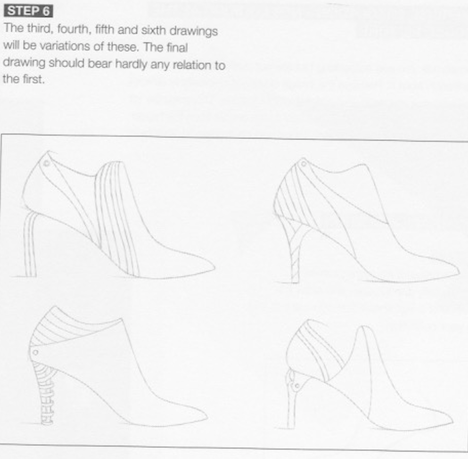
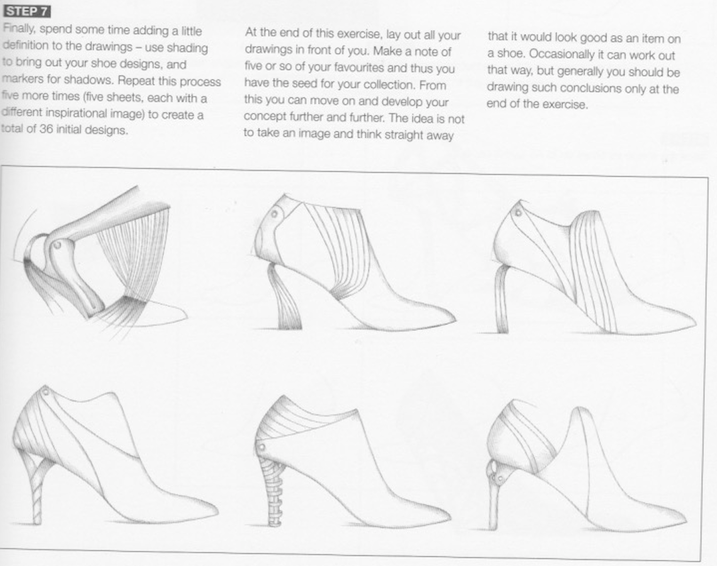
Idea development page. Combine shoe style with the inspiration pictures found. Pull, shapes and lines from your reference images. Have the last style you have chosen from Fashionary and trace. Using one of your inspirational images from your mood board follow the steps below to generate ideas.
Min. 6 design ideas, use thumbnail sketches.
Min. 6 design ideas, use thumbnail sketches.

Excerpt from Footwear Design by Aki Choklat
If you are someone who works more with their hands than the pencil you can try working directly on a last. This can also help those sketching to create better sketches and fresher ideas. You can drape, wind, stick elements onto a last. It will look rather abstract and not like a shoe and this is ok. This is idea generation mode, not final design mode! You want ideas. How do different shapes combine together? What is the structure of lines if fabric drapes over the last? etc.
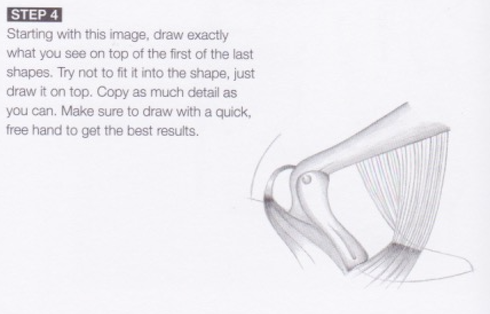
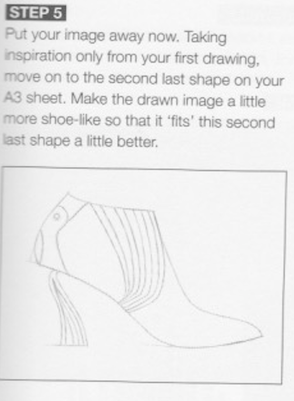
Your first designs will most likely be a combination of new stuff and old ideas from your head. Almost your default designs and default aesthetic. You need to push and challenge yourself to develop new ideas.
Your first designs will most likely be a combination of new stuff and old ideas from your head. Almost your default designs and default aesthetic. You need to push and challenge yourself to develop new ideas.
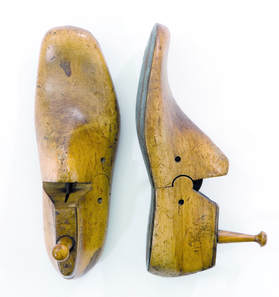
A last is a mechanical form that has a shape similar to that of a human foot. It is used by shoemakers and cordwainers in the manufacture and repair of shoes. Lasts typically come in pairs and have been made from various materials, including hardwoods, cast iron, and high-density plastics. A shoe maker has many variations of lasts in the studio for different sizes and styles.
Step 3:
Evaluation
Summary explaining your design.
- Is it for aesthetics or function?
- Where might you wear shoes like this?
- What target group do you think your shoe would appeal to?
Make sure to use proper design terminology when annotating your work. Each industry within the design fields have their own terminology to learn.
|
|
TERMINOLOGY
The following is a list of terms used to describe the components of a shoe. Some terms refer to
components that all shoes have such as a sole, while other terms may only apply to certain types or
a style of shoe.
COUNTER: A stiff piece of material at the heel of a shoe positioned between the lining and upper that
helps maintain the shape of the shoe. The counter helps strengthen the rear of the shoe.
FEATHER: The part of the shoe where the uppers edge meets the sole.
HEEL: The heel is the part of the sole that raises the rear of the shoe in relation to the front. The heel
seat is the top of the heal that touches the upper, this is typically shaped to match the form of the
upper. The part of the heel that comes in contact with the ground is known as the top piece.
INSOLE: A layer of material that sits inside the shoe that creates a layer between the sole and the
wearer???s foot. The insole adds comfort for the wearer.
LININGS: Most shoes include a lining on the inside of the shoe, around the vamp and quarter. These
linings improve comfort, and can help increase the lifespan on the shoe.
MID-SOLE: The layer of material between the outsole and the innersole used for reinforcement or cushioning.
OUTSOLE: The exposed part of the sole that contacts the ground. As with all parts of the shoe,
outsoles are made from a variety of materials. The properties the outsole needs are: grip, durability,
and water resistance.
QUARTER: The rear and sides of the upper that covers the heel that is behind the vamp. The heel
section of the quarter is often strengthened with a stiffener, which helps support the rear of the foot.
Some shoe designs use a continuous piece of leather for the vamp and quarter.
SEAT: Where the heel of the fit sits in the shoe. It normally matches the shape of the heal for
comfort and support.
SOLE: The entire part of the shoe that sits below the wearer's foot. As opposed to the upper. The
upper and sole make up the whole of the shoe.
THROAT: The front of the vamp next to the toe cap. For shoes were the vamp and quarter panels are
one piece the throat is at the eye-stay.
TOE CAP: Shoes may have a toe cap in the front upper of the shoe. Toe caps can take various forms,
but the distinct types are: complete replacements for the front upper of the shoe; stitched over toe
caps that add and extra layer to the upper; solid toe caps for protection, such as steel toe caps. Stitch
over toe caps may be decorative in nature. Toe caps help add strength to the upper front of the shoe,
an area that receives a lot of stress and wear from use.
TOP PIECE: The part of the heel that comes in contact with the ground. Made of a durable material
that helps maintain friction the ground.
TOPLINE: The top edge of the upper.
UPPER: The entire part of the shoe that covers the foot.
VAMP: The section of the upper that covers the front of the foot as far as the back as the join to
the quarter.
WAIST: The arch and in-step of the foot.
WELT: A strip of material that joins the upper to the sole.
http://www.skagen.com/wcsstore/Fossil/html/en_US/sizeguide/shoes_m_anatomy.html
Step 4:
Idea Refinement
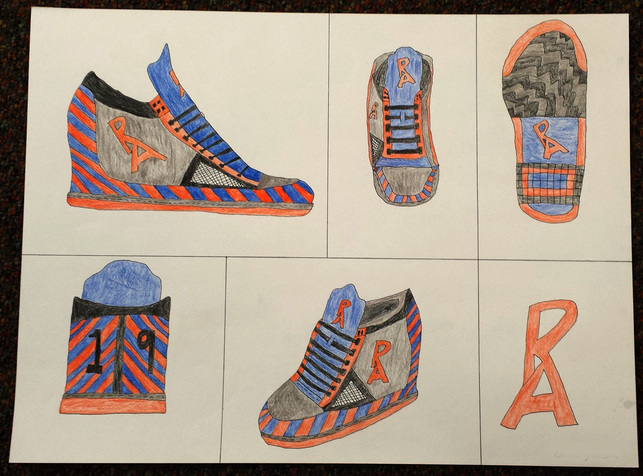
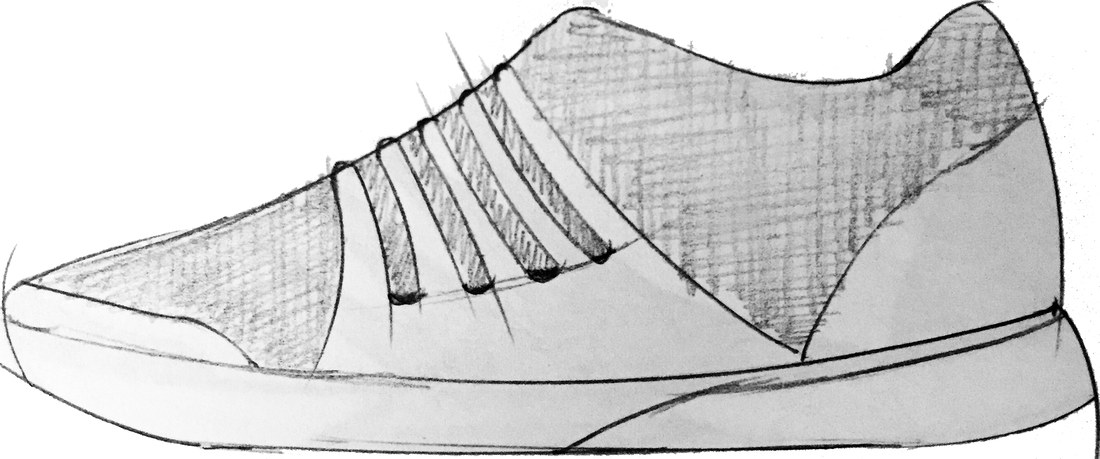
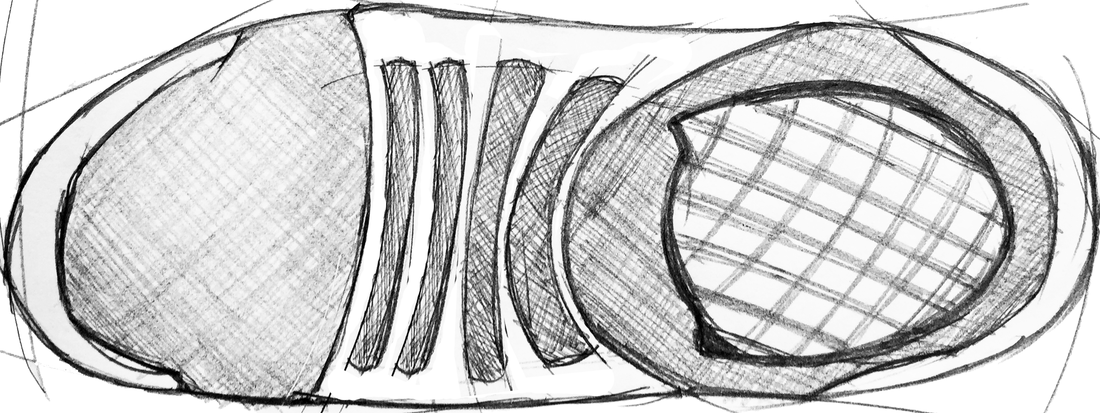
Create orthographic drawings of your design. Include side, top and angled or perspective view. This should have good craftsmanship and include labels. These drawings will be used in the next step of converting your drawing into a 3D image.
At this stage you want to pay attention to detail with your drawing and make it aesthetically appealing, but still useful. You want to be able to 'win' a client or commission through these concept drawings.
For the best result, draw a few variations and don't worry about getting it perfect first go.
DON"T
DO
At this stage you want to pay attention to detail with your drawing and make it aesthetically appealing, but still useful. You want to be able to 'win' a client or commission through these concept drawings.
For the best result, draw a few variations and don't worry about getting it perfect first go.
- Use the A3 template page to present your work. Place your best drawings under this template.
- Trace these drawings as well as you can, neatening as you go.
- Use pens and textas to outline and create shadows, highlights and mid tones to give life and form to your shoe.
DON"T
- Add unnecessary or decorative details to the page
DO
- Keep the page simple and clean
- Include labels
Step 5:
Final Design
Create your final design on a CAD program such as Fusion 360. This will allow you to create a 3D rendering of your design which can be used for further evaluation and discussion. Once modifications are made you would be able to use these renderings to display and promote your design. You can use these programs to print 3D models using a 3D printer.
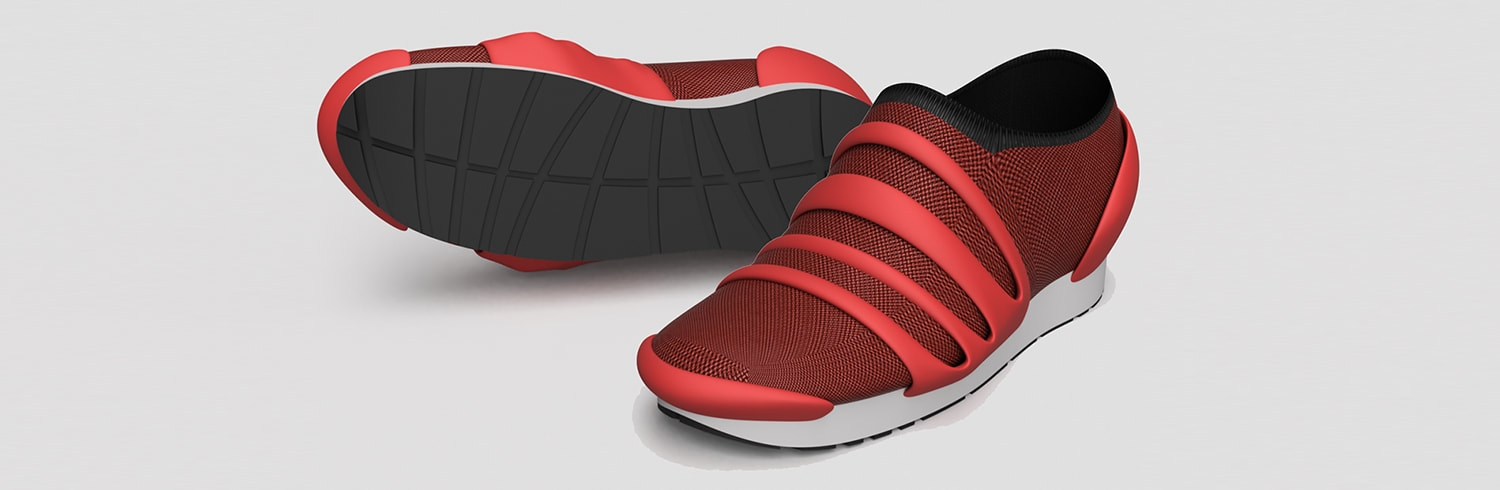
Example of shoe design made in Fusion 360
|
|
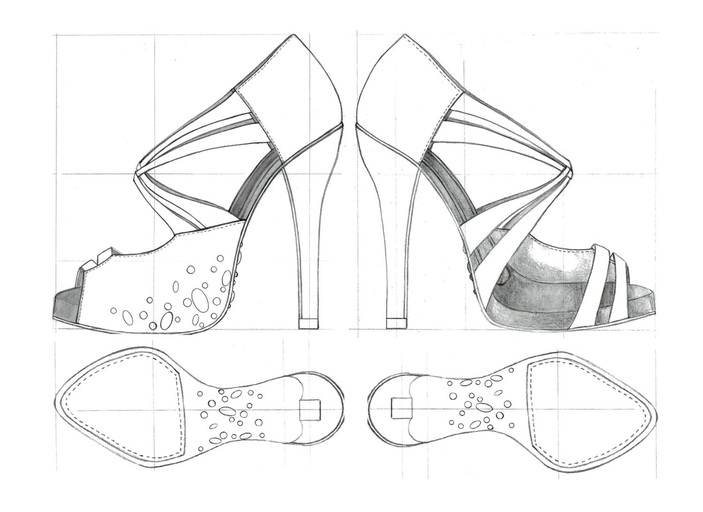
Sketches used to create the 3D model.
