Texture Vessels
Learning Context:
Create a conceptual artwork using clay. The focus here is to learn how to apply meaning to an artwork by looking at another culture and using it as an influence to inspire your work. A part of this process is to write an artist statement explaining the concept and it’s connection to other artists and cultures.
Purpose:
(What is being assessed)
- Conceptualisation and development of imaginative or personally relevant visual ideas. (Evidenced through the story board, final and it’s connections to the story) PA1
- Documentation of creative visual thinking and/or problem-solving processes. PA3
- Application of technical skills with media, materials, and technologies to communicate visual ideas in resolved work(s) of art or design. PA4
- Knowledge and understanding of visual arts in different cultural, social, and/or historical contexts. (Evidenced through research and use of cultural concepts and symbols) KU2
- Research and acknowledge sources to explore and develop insights into aspects of the visual arts. (Evidenced through providing a bibliography and accurate facts) KU4
- Evaluation of own practical work. (Evidenced through annotations) AR3
Process:
- Make a Pinterest board exploring cultural vessels and textures of the world – can be from a culture, environmental, pattern
- Annotate your images to explain their cultural importance, connection to concept and / or analyse and interpret artworks
- Think about concept
- What is a vessels function?
- What vessels are found in the world?
- How have various cultures used vessels?
- Brainstorm ideas for your vessel by making thumbnail sketches and notes with the aim to create meaning in the final piece
- Create a statement of intent
- Experiment working with clay with the aim at problem solving how to construct your chosen design. Document this process by taking photos
- Insert your photos into a Word or Powerpoint document and label them, they can be focused on:
- Technical skills and processes
- Idea generation
- Create your clay sculpture with good joinery, giving consideration to all sides of your form
- Write an artist statement explaining the starting influences, the concept and analyse the visual effect of the final outcomes
For this task you will need to observe some Aboriginal artworks. Their paintings are full of pattern and texture. They also practise weaving which is heavy with texture. You will need to use similar patterns and textures to create a vessel out of clay.
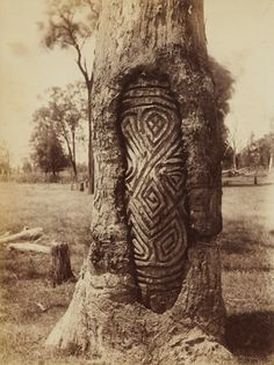
For thousands of years Aboriginal groups in central New South Wales marked important ceremonial sites by carving beautiful, ornate designs on the trunks of trees. The carvings, comprising symbolic motifs, intricate swirls, circles and zigzags, were intended to be long-lasting but, instead, only a handful of the trees on which they were carved are still alive today.
Found on australiangeographic.com.au
Found on australiangeographic.com.au
|

|
|
|
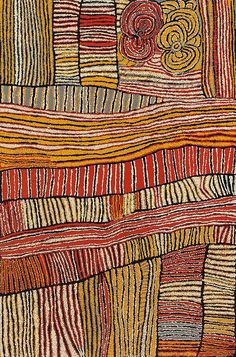
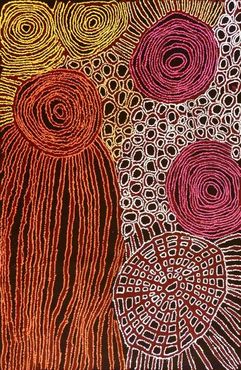
Walangkura Napanangka, Tjurkurla, 2005
|
Mavis Ganambarr, Basket, 2006.
|
Walangkura Napanangka
|
The other option is to choose an Asian artist. Many Asian cultures are steeped in tradition and history with pottery and ceramics.
Your Task
You will be looking at Aboriginal, Torres Strait Islander and Asian artwork for inspiration. You will be learning how to create vessels from clay using either a coil or slab building technique. The aim of this task is to understand form and function. You will need to create a repetitive design or pattern that can either be carved or added to your vessel form.
Process:
Process:
- Choose an Aboriginal, Torres Strait Islander or Asian artwork that inspires you. Research this artist. Who are they? Where are they from? What inspires them?
- Draw 5 different designs. Try different overall forms for the vessel, it could be tall, wide, fat, round, geometric, faceted, etc.
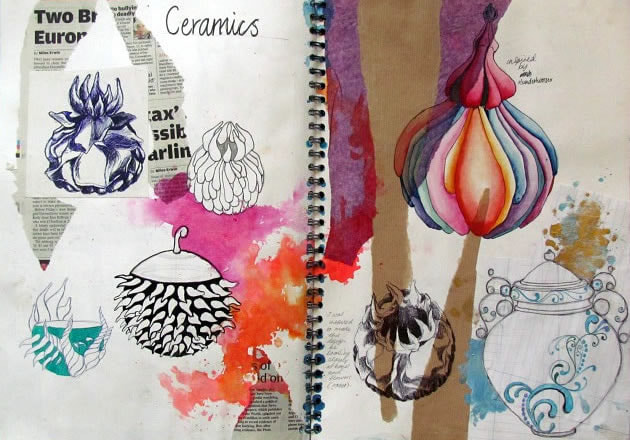
From: https://www.studentartguide.com/articles/sculpture-3d-design-sketchbooks
- Experiment with clay trying different patterns and textures, referencing the artwork that you have chosen. What different solutions can you come up with? Sketch 3-4 of your experiments and label how you made them and describe the pattern.
- Wedge your clay to make sure no air bubbles are trapped. This can cause your clay to explode inside the kiln during firing.
- Create your vessel form either with the coil or slab technique. Make sure you are very careful when doing clay together. Always rough up the edges of the clay on both sides to be joined. Apply slip (wet, almost liquid clay which acts like a glue) then mold the edges together.
- Either carve or add the pattern to your vessel form. (Some designs may have the pattern being made while the vessel form is constructed.)
- Make sure there are no large areas of solid clay. These may need to be hollowed out.
- The clay will need to sit and dry for a few days before it can be fired to make it hard.
- Once out of the kiln, apply a paint or surface treatment. This may be a single colour to help show the form of the vessel. As our forms are full of texture and pattern sometimes it is nice to create one flat colour to help emphasise the patterns rather than distract and complicate the piece with many colours. White or off white is good for showing up forms and textures because it creates obvious shadows and highlights.
Compulsory criteria:
- Research of artist 250 words.
- 3-4 sketches of pattern/texture tests.
- Final vessel form with pattern or texture.
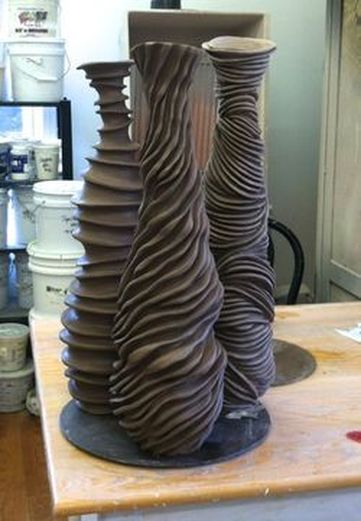
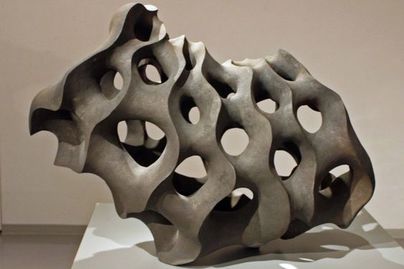
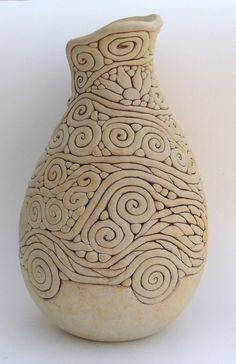
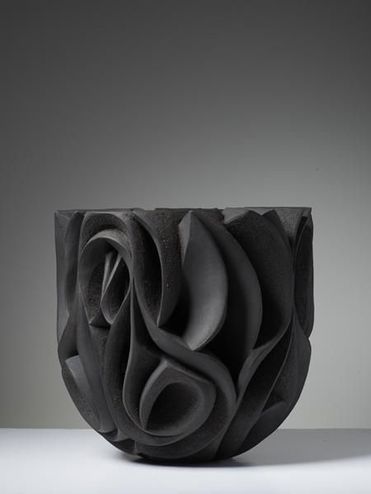
Create by adding and subtracting clay onto a vessel form to create these deep grooved forms.
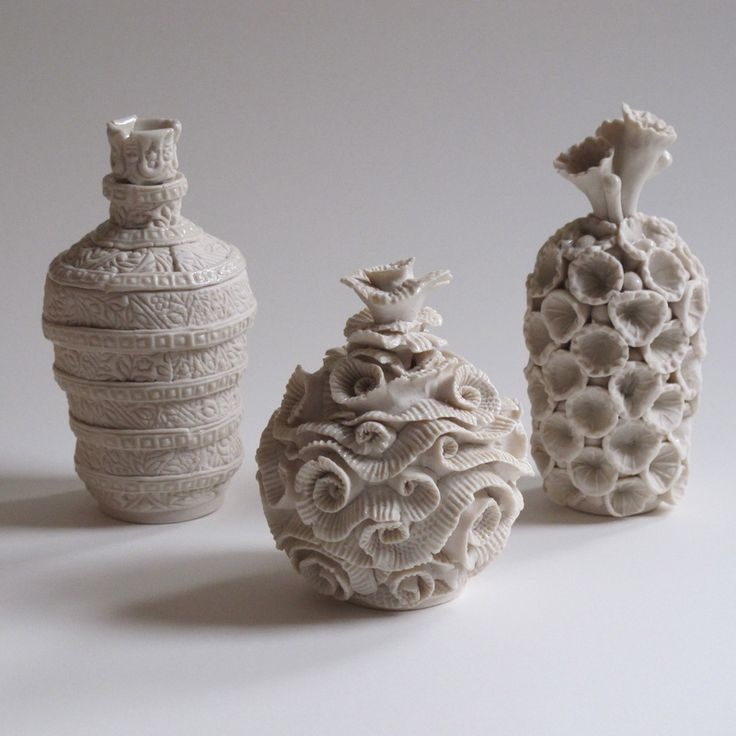
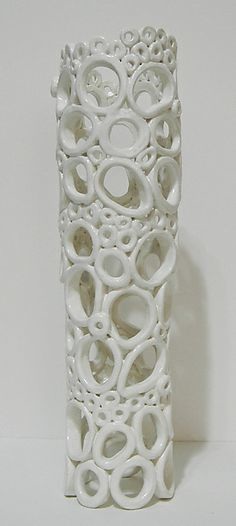
Cut shapes from a slab, textured and attached to a vessel form.

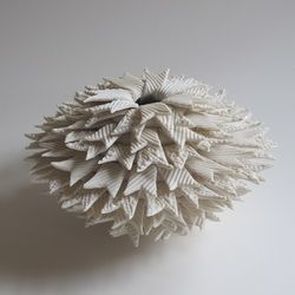
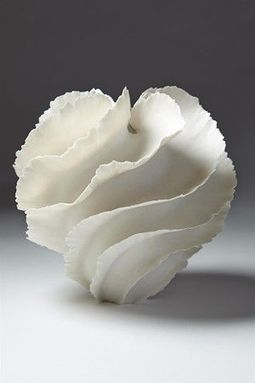
Pinch pot form with individually hand formed pointed shapes.
|
Cut shapes from a slab, textured and attached to a round vessel form.
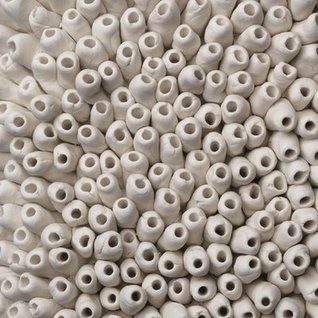
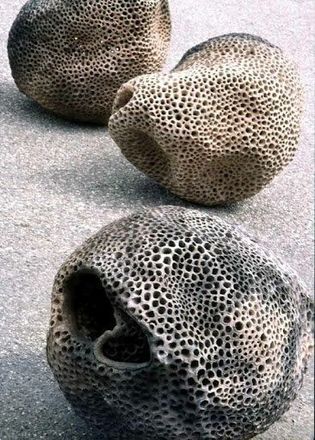
Coils or spheres attached to vessel with a stick poked in. This create a coral like texture.
|
How to work with clay
Clay is a form of decomposed rock. After being mined from the earth clay is soft and mouldable. When heated to around 1000 degrees celsius in a kiln, the clay becomes hard and dry.
Wedging
Wedging is the process used to remove air from the clay. It is similar to kneading bread. You need to remove the air, otherwise your clay will explode in the kiln when firing.
Coil Building
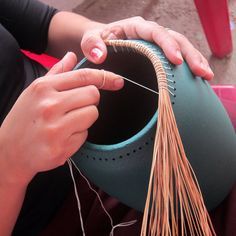
Coil construction is a method for building up layers of clay to form a vessel using a coil. This can be a useful technique to create woven effects.
Slab Building
With this method you are creating flat slabs of clay that you can cut out shapes and construct. Roll out the clay to an even thickness using a rolling pin. You can use two sticks of even thickness on either side of your clay as a guide. Don't make your clay any thinner than you pinky finger and no thicker than your thumb.
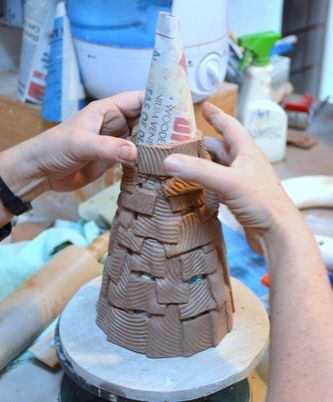
Hand building
As you can see, there are many ways to make clay forms. there is no one or correct way. You can make your own mould or form to build your clay around. The example below shows newspaper shaped into a cone helping provide structural strength and act as a guide to obtain a consistent form.
You could create a ball of paper for a sphere, use cardboard for a box form or some form of PVC pipe or cardboard roll for a cylinder. Apply vaseline to your form to prevent the clay from sticking. Allow the clay to dry to a leather hard or bone dry state before removing your frame structure.
You could create a ball of paper for a sphere, use cardboard for a box form or some form of PVC pipe or cardboard roll for a cylinder. Apply vaseline to your form to prevent the clay from sticking. Allow the clay to dry to a leather hard or bone dry state before removing your frame structure.
Carving
In the video below, Ellis creates a very detailed relief carving. You can see how she cuts into the clay, trims, pushing and using different tools to form the clay. This can be done on a larger scale with less intricate details as well.
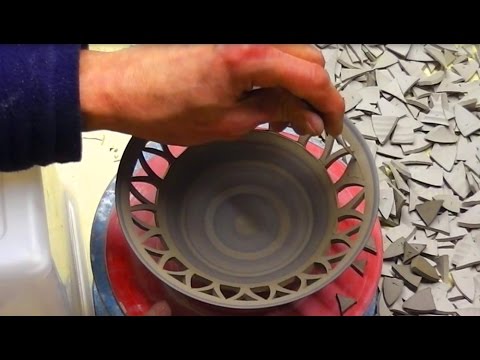
Another way of carving is to completely cut through areas of the clay, creates holes or spaces.
Another way of carving is to completely cut through areas of the clay, creates holes or spaces.
Additions
What you create is limited only by your creativity. If you have an idea, but don't know how to do it, just ask.
Of course you can also add clay to create different effects as well as carve. Use the slab technique or simply mold shapes with your hands, score, slip and press onto your vessel form. This can create very dramatic pieces.
Of course you can also add clay to create different effects as well as carve. Use the slab technique or simply mold shapes with your hands, score, slip and press onto your vessel form. This can create very dramatic pieces.
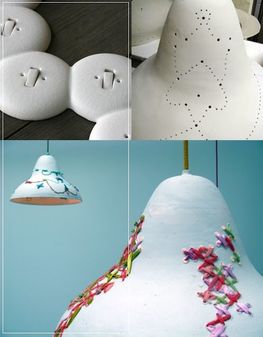
You can also sew into your clay. You need to make the holes for your thread before firing. When creating holes in clay, be aware that clay shrinks when fired. This means you will need to make the holes a bit larger than expected. Afterwards you can use thread to create patterns, like embroidery, or create a lip using a weaving method.
|
|
You don't have to fill the holes with thread. Create a pattern in the arrangement of the holes. This can make a subtle piece, made stunning by light and shadow.

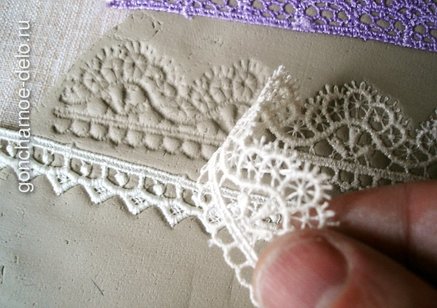
Printing
You can also print or press textures into your clay. Take any textured surface such as lace and either press it into the clay with your hands, use a rolling pin or a wooden bat.
Drying
Over time your clay will dry out. To prevent it from drying while you are still working with it, place it in a plastic bag to keep the air off of it. If it is hot weather, your clay is a bit dry already or you are leaving it for a while, squirt some water onto the clay before putting it into the bag. Remove excess air, but don't squish your artwork! Make sure you tie off or secure the end of the bag before leaving it.
Leather hard
This is a term used to describe clay that has begun to dry and is similar to leather. You can still bend the clay and construct with it, but it is no longer soft and pliable. This stage is perfect for creating slab construction with straight walls and sharp edges.
Bone dry
This is the stage when most of the moisture has left the clay leaving it hard, but brittle. You can tell the clay is dry by the lightened colour. The clay needs to dry out to this stage. If you try to fire clay that still has moisture in it, it will crack and cause damage to your piece.
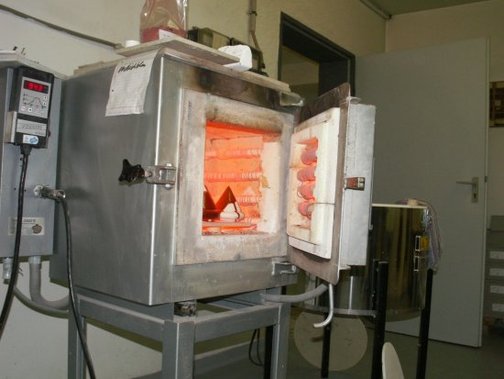
Kiln Firing
A kiln is like a big oven. This is where your clay is placed inside, secured and fired.
Bisque firing
A bisque firing is the first firing. This makes the clay hard, but it is still porous. This means moisture can still get into the clay. After a firing the clay can not be turned back into a soft state. At this stage clay items can be stacked into the kiln, it doesn't matter if the clay items touch each other, they won't stick or damage.
Often when creating clay items, the clay is fired again with a glaze. This is explained below.
Surface Treatment
Once the clay has been fired in the kiln we can apply a surface treatment.
Traditionally you would apply a glaze. This is a hard, glass like finish that stops the clay from being porous. It is applied in liquid form by simply dipping the clay into a bucket of glaze. The glaze is made up of different chemicals and compounds so it is often hazardous to work with. It is important that a glaze does not touch the kiln shelf as it will adhere or melt onto it. The glaze becomes hard and glass like after firing and if there are any drips on the shelf this can be very sharp.
For our own clay vessels we will simply be using paint.

Glaze being applied
|
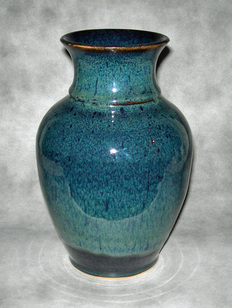
Traditional glazed vessel
|
