Drawing in Proportion
Learning Context:
For this task you will be introduced to proportion. There are a series of drawing exercises to complete, you will be tasked drawing a face in correct proportions as well as a series of drawings using various mark making.
Purpose:
(What is being assessed)
- Application of technical skills with media, materials, and technologies to communicate visual ideas in resolved work(s) of art or design. (Evidenced through practical work) PA4
- Use of visual arts language to interpret and respond to works and their contexts. (Evidenced through labels/annotations) AR2
Process:
Part 1 Proportion
- Create a series of sketches using accurate proportions
- human face
- animal
- apply tone (values of light, mid to dark) and texture to one of the above
Proportion
Proportion refers to the relative size and scale of the various elements in a design. The issue is the relationship between objects, or parts, of a whole.
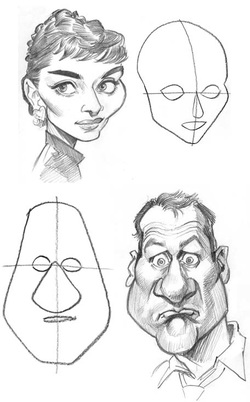
Using Basic Shapes to Plan a Drawing
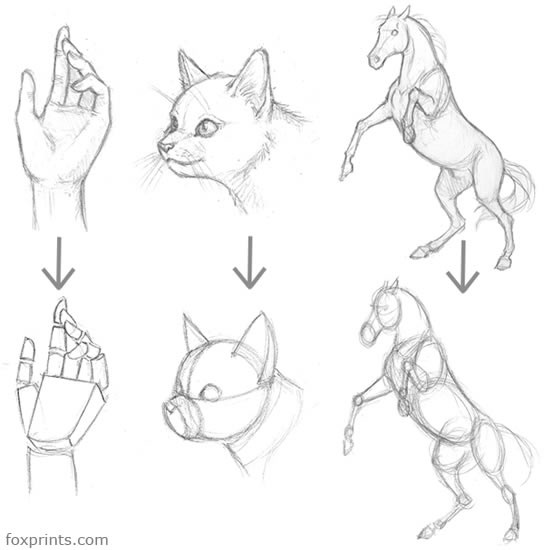
A common mistake when learning to draw realistically is to jump the gun and go straight for the details. This can often lead to drawings that have unusual proportions and give off the sense of being 'wrong.'
It is good to plan out your drawing by using basic shapes. This helps you to get something onto the paper without it needing to be precise.
1. Start by breaking you subject into basic shapes. You can do this in your head or print out a picture and draw over the top.
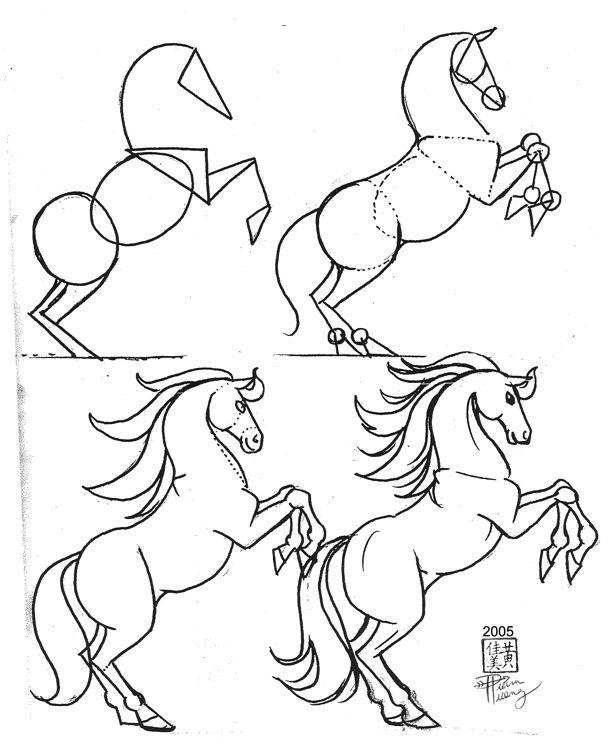
2. Draw these shapes onto paper. You probably won't get them right the first go! Be patient at this stage. Adjust the shapes so that they are in correct proportion to one another. For example, if drawing the horse above, make sure the head is in proportion to the body. If your proportion and general plan are not correct now, your drawing will not turn out to be truly realistic and will seem 'off.'
3. Once you are happy with your shape sketch, start to connect or 'flesh in' the areas together.
4. Erase any unnecessary lines from the planning stage.
5. Continue to refine your drawing. Start to add details such as the eyes and hair.
6. Add tone and shadows to your drawing.
Have a go at drawing this horse below:
It is good to plan out your drawing by using basic shapes. This helps you to get something onto the paper without it needing to be precise.
1. Start by breaking you subject into basic shapes. You can do this in your head or print out a picture and draw over the top.
2. Draw these shapes onto paper. You probably won't get them right the first go! Be patient at this stage. Adjust the shapes so that they are in correct proportion to one another. For example, if drawing the horse above, make sure the head is in proportion to the body. If your proportion and general plan are not correct now, your drawing will not turn out to be truly realistic and will seem 'off.'
3. Once you are happy with your shape sketch, start to connect or 'flesh in' the areas together.
4. Erase any unnecessary lines from the planning stage.
5. Continue to refine your drawing. Start to add details such as the eyes and hair.
6. Add tone and shadows to your drawing.
Have a go at drawing this horse below:
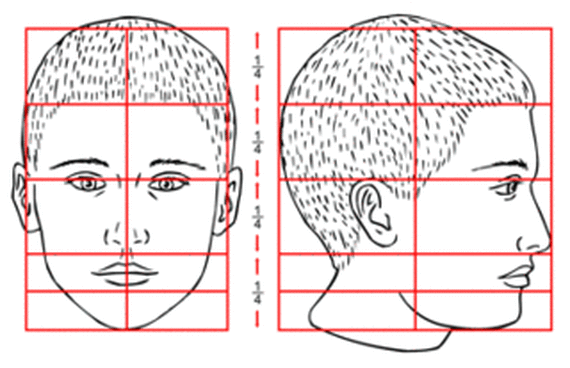
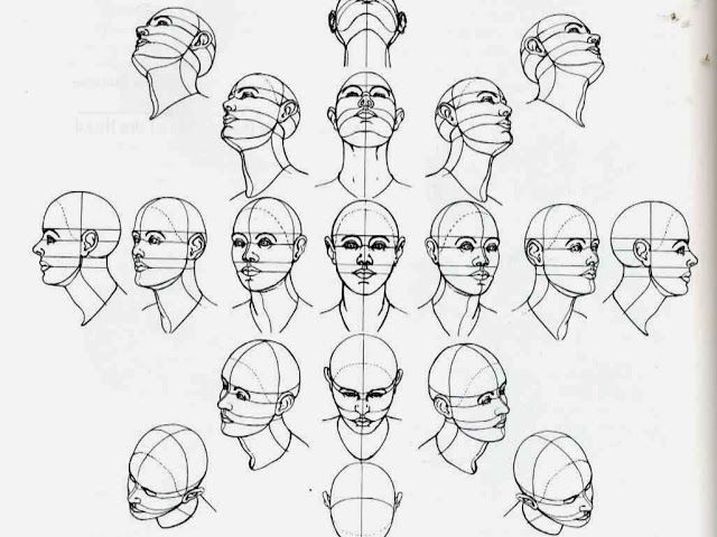
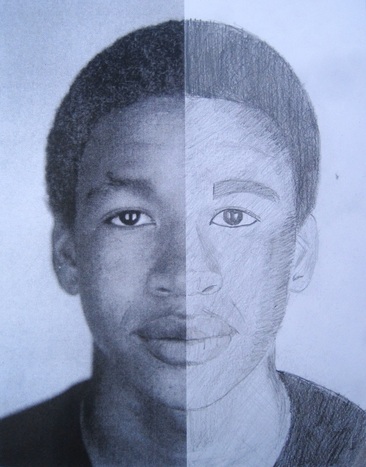
Symmetry and proportions of the human face.
Once you have practised proportion, try this exercise.
Procedure:
1. Find a photo of a face that looks straight at you. You don't want it to be on an angle as this will be much harder.
2. Measure the face and mark the mid point. Rule a straight line through the face vertically. Cut on this line.
3. Glue half of the face on a larger piece of white paper.
4. Draw in the half of the face you have removed. This will help you practise the proportions of the human face. Try to make it as symmetrical as you can.
Pay close attention to the proportion. You can even try measuring areas to help you.
5. Once the proportion is as good as you can get it, add details and tone. (You could add things like a hat, glasses or a bow tie.)
Remember, art does not need to look realistic to be 'good.' These exercises help us to learn and challenge ourselves.
Practise helps us to succeed!
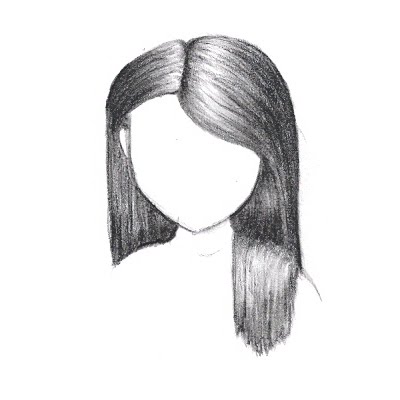
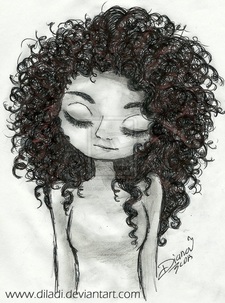
Tips for drawing hair
|
|
|
Use tone, make sure you have some highlights and shadows.
- In the first example you can see there is a strip of light with a darker part in the middle, this gives the hair form.
- Second example shows mark making (experimental line) to create curly hair, experiment with the mark making that suits your person the best.
- Third example shows a mixture of mark making and tone.
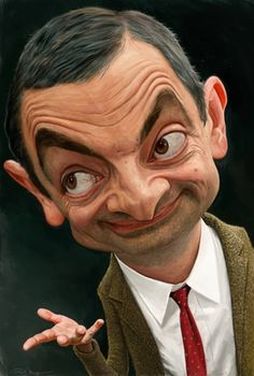
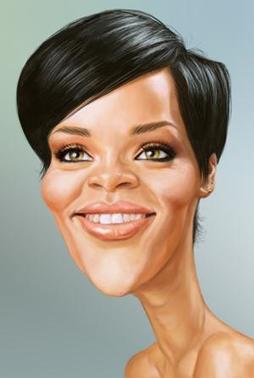
caricatures
Another thing to try. Instead of using the correct proportion, you can try exaggerating the proportion of facial features. This is a technique used when creating cartoons and caricatures. The exaggerated feature often helps describe the persons personality.
|
|

|
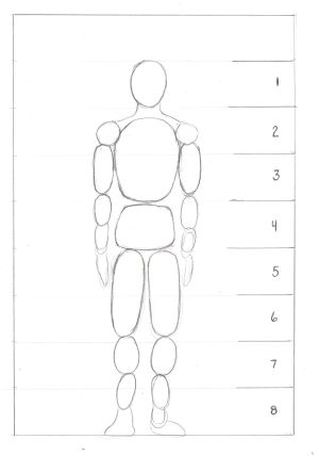
Proportions of the Human Body
Typically, the human body is described as 8 heads high. Understanding the anatomy of a person or animal will help you to draw more realistically.
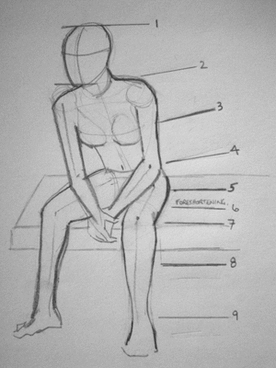
A well-proportioned figure, regardless of variations due to gender or such, is defined by the alignment of the joints, which is invariable (that is, we perceive something odd if it does vary). This is our groundwork for proportions. Draw your own chart with me as we go, it really helps learning the material.
Start by drawing an oval or egg shape (pointy end down) for a head, and mark down eight measurements, the last one being the ground.
The measurement (ideal male height = eight heads) was set down during the Renaissance as an idealization of the human form. It’s rather obvious that very few people are actually eight heads tall (even Northern Europeans, who served as basis for this model, are closer to seven heads), but this is still the best model to start with, as it makes it easier to grasp the alignments.
|
|
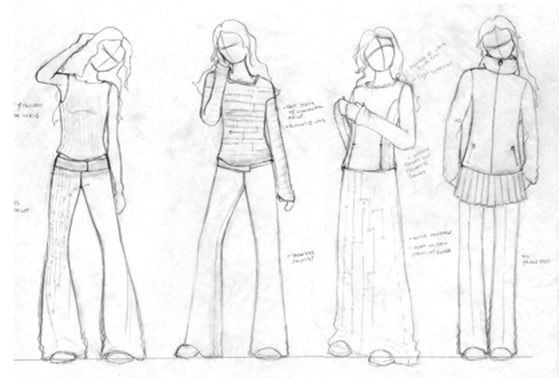
Once you have learnt the proportions of the body, the next step is to make the figure look 'natural.' Most people don't stand completely straight with arms and legs rigid. They might lean to the side or have an arm up. If one part of the body moves, even slightly, it effects the rest of the body.
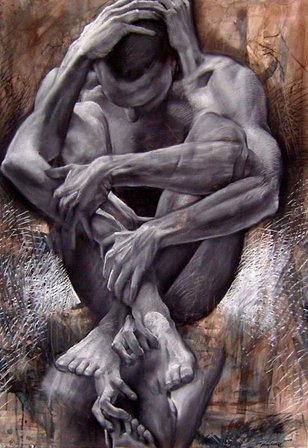
Jakub Kujawa, Cocoon
Can you see the role proportion plays in this artwork?
What do you think this person might be thinking?
Why do you think this artist has painted this man the way he has?
What do you think this person might be thinking?
Why do you think this artist has painted this man the way he has?
In todays society, many people are embarrassed about the way they look.
Do you think this is a fair statement?
Have a read of the article found by the button above. Then, try writing 7 positive things about your own body.
Was it difficult?
Next time you look in a magazine or photos of celebrities, remember, photoshop. The vast majority of photos in the media/internet/magazines etc. have been manipulated in some way.
