Two Point Perspective
Learning Context:
For this task you will be introduced to perspective, you will need to understand the differences between one, two and three-point perspective.
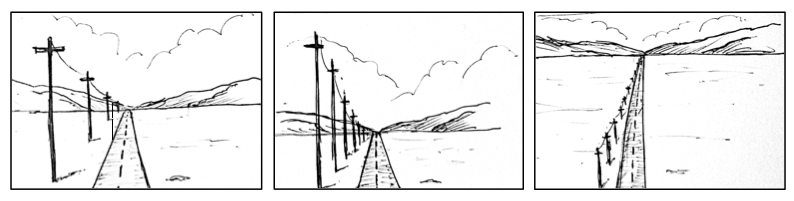
Basic tasks introducing you to techniques of drawing with two-point perspective including establishing viewpoint/horizon line (eye line), and accurate depictions of equidistant objects as they recede from the viewer (e.g. fence posts, stobie poles, etc.)
Basic tasks introducing you to techniques of drawing with two-point perspective including establishing viewpoint/horizon line (eye line), and accurate depictions of equidistant objects as they recede from the viewer (e.g. fence posts, stobie poles, etc.)
Purpose:
(What is being assessed)
- Application of technical skills with media, materials, and technologies to communicate visual ideas in resolved work(s) of art or design. (Evidenced through practical work) PA4
- Use of visual arts language to interpret and respond to works and their contexts. (Evidenced through labels/annotations) AR2
Process:
Part 2 Perspective
- Everyone will create the same basic drawing of a cottage
- Follow the steps on the powerpoint and teacher instruction
- Label the parts of the building
- Trace your basic house design and draw a surrounding environment
How to create Space and Depth in a Drawing
Overlapping
Overlapping in art is the placement of objects over one another in order to create the illusion of depth. Painting is a two-dimensional artistic expression. It has length and width but no depth. It is necessary, therefore, for artists to provide viewers with some sort of perspective in establishing size and distance in paintings. This is where overlapping comes into play.
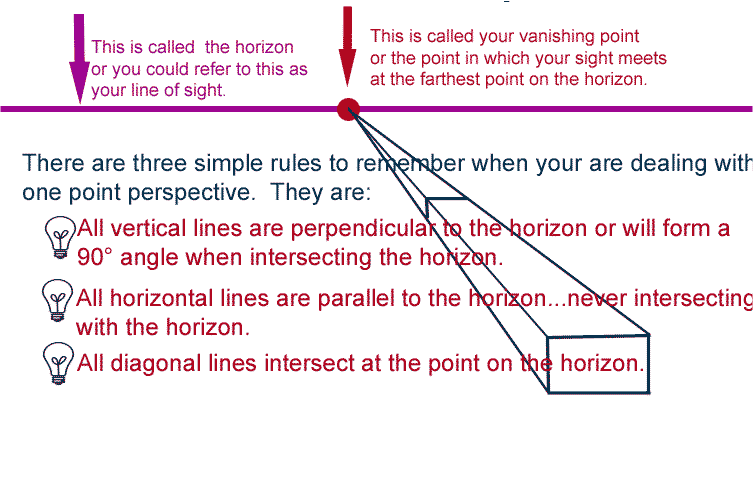
Horizon line
The horizon line in perspective drawing is a horizontal line across the picture. It is always at eye level - its placement determines where we seem to be looking from - a high place, or from close to the ground. The actual horizon might not be visible, but you need to draw a 'virtual' horizon to construct a picture in perspective.
One Point Perspective
For this task you have 3 drawings to complete.
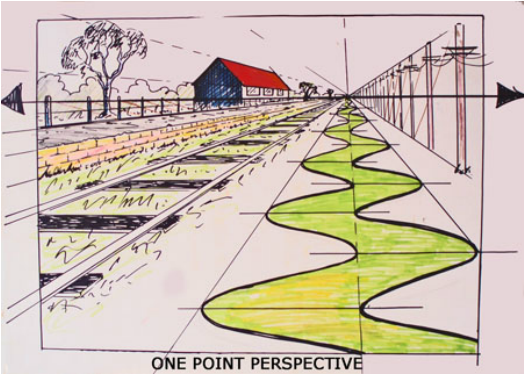
Perspective in drawing or painting, is a way of portraying three dimensions on a flat, two-dimensional surface by suggesting depth or distance. The techniques you will learn can be used for any subject, not just landscapes.
In one point perspective, only one vanishing point is needed because the sides of all objects are moving away from us in the same one direction.
In one point perspective, only one vanishing point is needed because the sides of all objects are moving away from us in the same one direction.
Drawing 1.
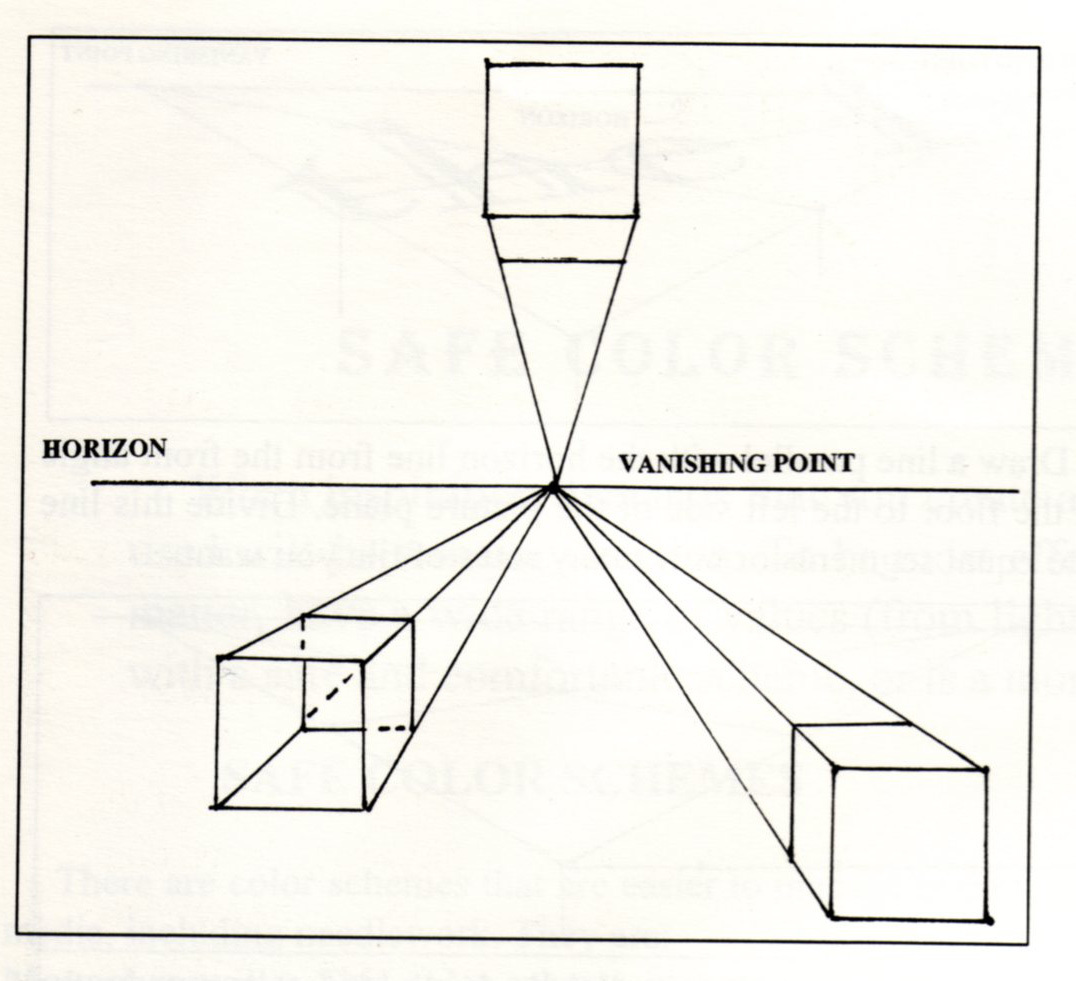
Try drawing the boxes below to practise one point perspective. You must use a ruler.
1. Start by drawing a horizon line in the middle of your page.
2. Place the vanishing point on the centre of this line.
3. Draw a square in the top centre of your page. (This begins the first box)
4. Draw a line from the vanishing point to the two bottom corners of the square.
5. Draw a line within these lines, parallel to the square above.
This creates perspective for a box that is straight in front of you from above.
6. The next box is in the bottom right corner. Draw a square there.
7. This time draw a line from every corner of the square to the vanishing point. (This box is on the left of the vanishing point, therefore we can see more sides or angles.)
8. Draw another square, but this time further along the vanishing lines, this square should fit within the lines and should be smaller than the first.
9. Erase all the lines that are inside you original square. The 'vanishing point lines' are there as a guide. We can erase the lines no longer needed to create the illusion that this box is a solid form.
The last box is created in the same way as the last. However this time you don't want to erase all of the lines. Do the same steps from 6-8, but this time put the box in the bottom left corner.
10. Erase the line on an angle within the most central square.
11. Now erase the central line within the right side and top side of the box.
The 'vanishing point lines' are there as a guide. We can erase the lines no longer needed to create the illusion that this box is open at the front and back.
These are some of the basic skills needed for many tasks such as: realistic drawing, creating blue prints for designing furniture and architecture.
Now, try to create a simple drawing using 1 point perspective.
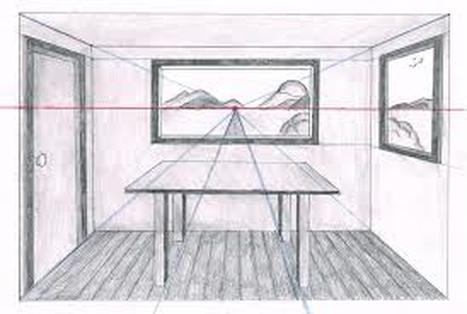
Two Point Perspective
Two point perspective is just like one point, shown above. However by using 2 points, it allows you to create a more realistic sense of space and depth within an artwork. Below is a long box. Note that its front two sides are foreshortening away from us. That is because they are receding into the distance.
Drawing 2.
Try drawing this simple example before creating your own street view below.
1. Start by drawing in your horizon line and vanishing points.
2. Then draw a vertical line over the horizon line and in-between these 2 points.
3. Now draw a line from the vanishing point to the top and bottom of the vertical line. Do the same with the other vanishing point.
4. Draw another vertical line on the left of the first and again on the right of the first.
Yo now have a box and can erase the guidelines (shown below as dotted lines)

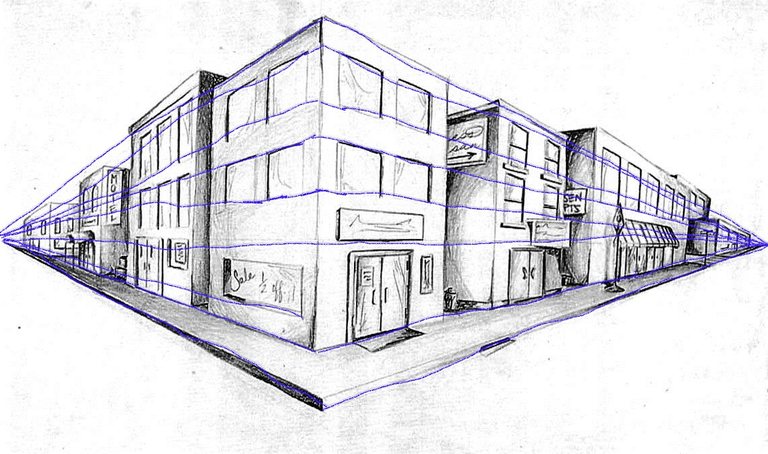
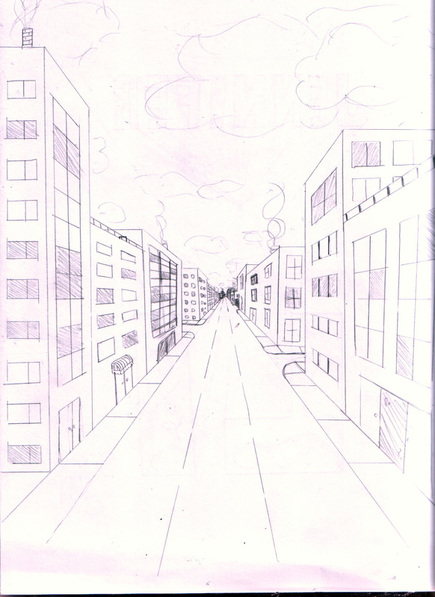
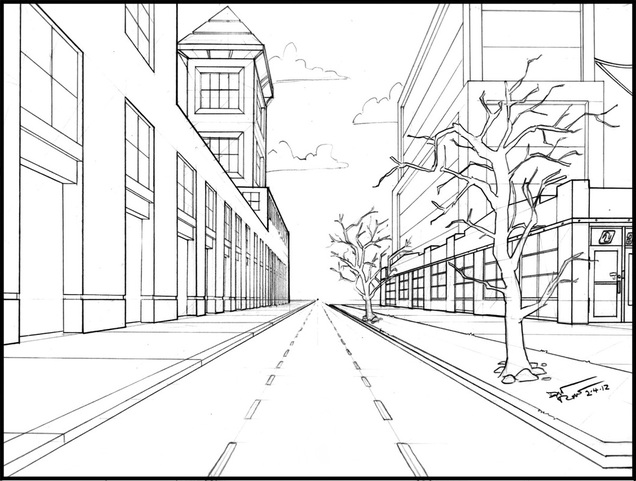
Drawing 3.
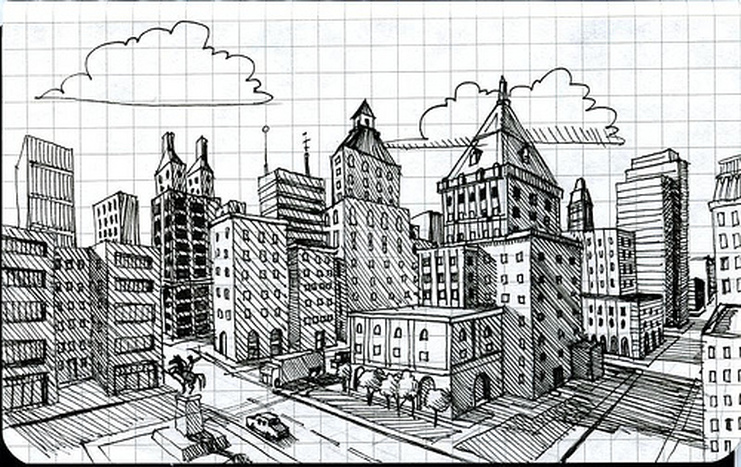
Buildings are a great way to practise perspective. Try drawing your own view of a town, like the one shown below.
1. Use the same steps as above to begin your town. This will create the building at the front.
2. Create more box forms on either side of the centre box. Keep the base of the buildings on the same level. However create different heights for the buildings for a realistic effect.
Make sure the buildings are overlapping each other. When we view a town, some buildings are in front of others and there are signs and trees lining the street in front of the buildings as well.
3. Once you are happy with the forms of the buildings you can begin to add details such as windows, doors, signs and pavement. Make sure you are still following the 'vanishing' or guidelines to keep these in perspective too.