Observational Drawing
During the semester in-between tasks and during tasks when waiting for things to dry, have a go at observational drawing.
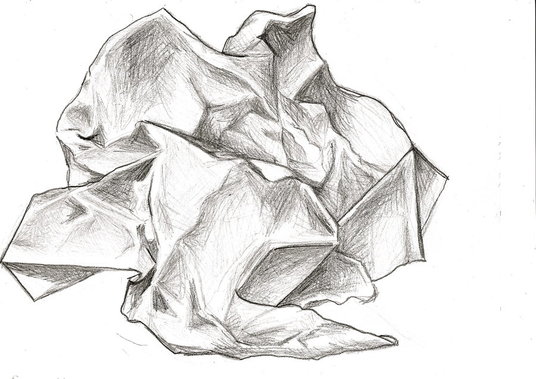
I have printed off some images that you can copy from. The best method for observational drawing is to draw from real life. Find something in the classroom and set it up on your table to draw. You can ask for a lamp to help emphasise the values of your subject.
Remember, observational drawing is aimed at learning how to draw realistically. This page will help direct you towards realism. Of course, this is not the only valid form of drawing, but these techniques can help create abstract work as well.
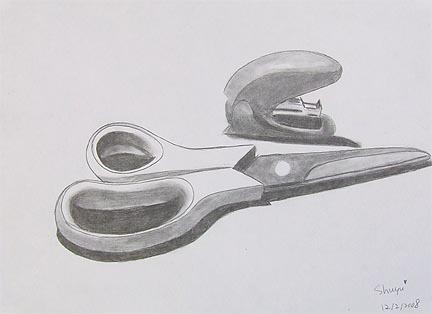
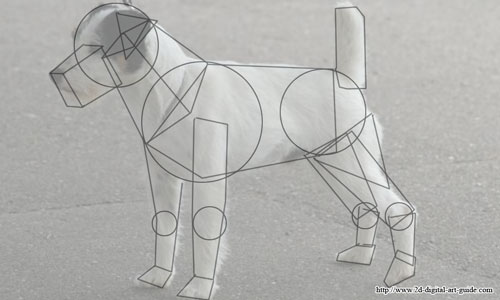
1. Use your picture and (if it's laminated) break down your subject into shapes by drawing over the top.
(Try using an easel and large paper to loosen up your drawing. Give it a go!)
2. Draw these shapes onto your page comparing them to each other in terms of scale and position. Draw lightly!
(Make sure you consider where your drawing is going on your page, consider the space and were your sketch might look good)
3. Check and refine your shapes checking that the proportion is correct before you start to put in any detail. Proportion is the thing most people get wrong and it is hard to fix later!
Step back from your piece to check it's progress. Artworks look different when you step back and can allow you to see where problems are forming.
4. Start to fill in some of the gaps between the shapes. I call this 'fleshing out' the shapes.
Practise, you can't get anywhere if you don't give it a go in the first place.
No one is looking for 100% perfection from you.
Give it a go without the expectation of perfection, it can not be obtained.
Draw what you see not what you know
The most common mistake when creating an observational drawing is to draw from memory. You really need to look at your subject, constantly referring to it if you want it to look realistic in the end. You need to be constantly looking at the space around your subject, not just creating a contour line around the subject.
If working from life, roughly sketching outlines of the major forms will allow you to get the proportions right, before you add the details. While you do this, you should constantly check which points line up (i.e. edge of nostrils lining up with edge of eye) and the size of every object should be estimated in relation to the things that are beside it. You must get used to seeing things not in terms of absolute scale, but in terms of how one thing compares to another.
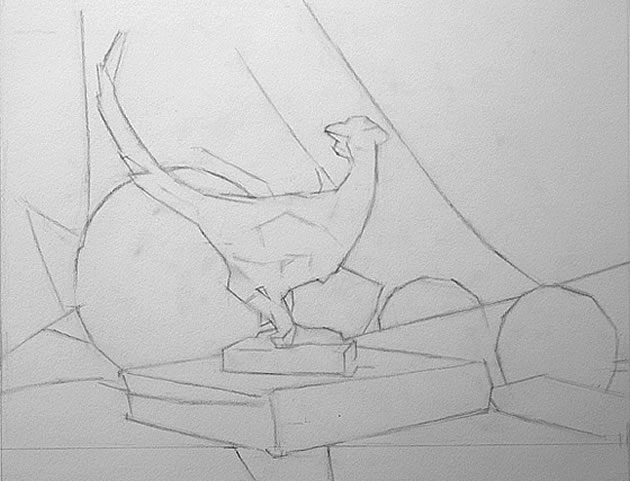
Break your form down into shapes
Create variety in value
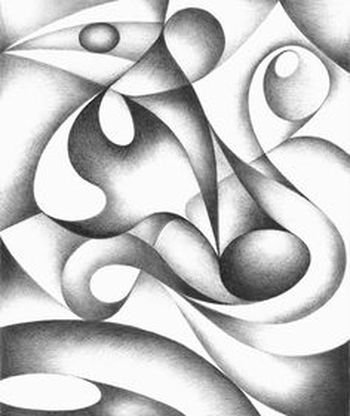
Try different ways of creating line
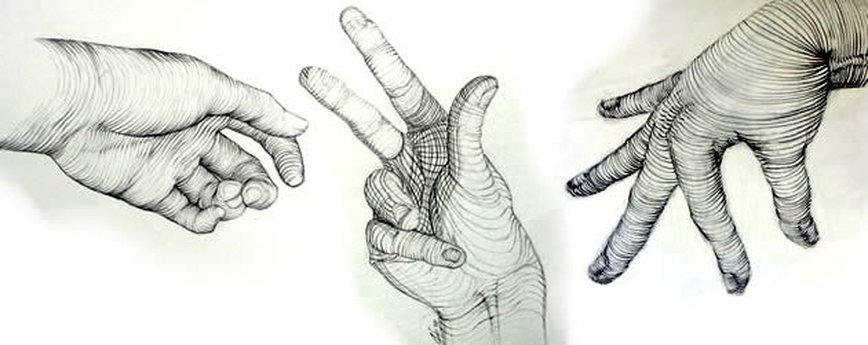
Hands are a great subject for a cross contour line drawing exercise. Hands can create interesting, complex, curving shapes, as in the examples above, and are readily available for first-hand observation. Note how the density and weight of the line also helps to communicate areas of light and shadow.
Experiment and Discover
Your drawings don't need to have tight, precise lines to look good! In fact often loose lines that have energy (created by the faster movement of the hand while drawing) can have more appeal as they convey an emotion.
|
|
Victor Sheleg
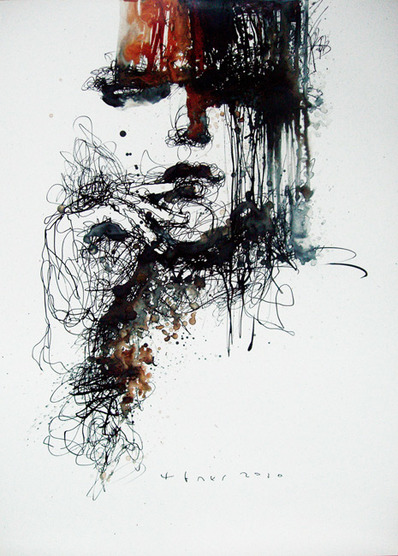
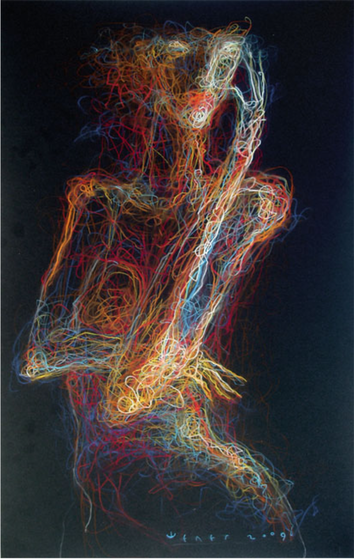
If something like this seems intimidating, try creating a proportional drawing first. Then use a light table and trace through the paper. Don't just draw the same thing! Rather change up your use of line and draw within the lines. Both of the images above don't have a clear outline, rather, areas have been built up with scribble like lines. One focuses on the shadows (left) and the other on the highlights (right). He is drawing the value rather than an outline.
The left picture is built up with scribbly lines in the dark toned areas. Then he has added ink for the hair and under the chin, curving down under the hand. This helps to bring a warm brown and blue hues to liven up the drawing while adding texture and movement. You can see he hasn't just coloured it in, there are still white gaps leaving highlights, like the streaks in the hair.
The left picture is built up with scribbly lines in the dark toned areas. Then he has added ink for the hair and under the chin, curving down under the hand. This helps to bring a warm brown and blue hues to liven up the drawing while adding texture and movement. You can see he hasn't just coloured it in, there are still white gaps leaving highlights, like the streaks in the hair.
